Painting
Speed Painting WWII Infantry with Citadel Contrast Paints
Aug
As an Amazon Associate Wargaming3D.com will earn from qualifying purchases.
I’ve been miniature wargaming on and off for the better part of the last 25 years, painting my first miniature using old Humbrol oil based paints that my father purchased for me to build kitset models. I quickly moved onto my first box set of Warhammer fantasy battles, the old starter paint set containing a Chaos Warrior and the various incarnations of citadel paints over my years playing fantasy and sci fi wargames. Fast forward to now and I’d say 80-90% of my gaming is historical, with my paints being provided by Army Painter and Vallejo due to availability on Amazon Prime price and color match with historical colors.
That said, I still religiously use Agrax Earthshade and Nuln Oil and even have a secret stash of 20 year old inks, washes and glazes from the old citadel range that I scored off craigslist.
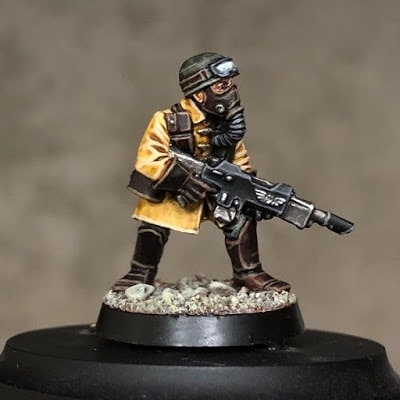
Recently I was painting my backlog of 3D printed tanks and ran out of Agrax Earthshade, so off I went to my local GW as my FLGS was out of stock. Normally I avoid GW stores like the plague as I can’t stand their sales techniques and being stalked by their staff throughout the store, but I needed that shade and while I was there their new range of Citadel Contrast paints caught my eye along with a bunch of miniatures that had been painted exclusively in them. Which got me to thinking, wouldn’t it be great to be able to paint rank and file historical miniatures (especially my Russians in summer uniform) quickly and painlessly so I can spend more time on my 3D printed tanks, and more unique models. I wonder if I could paint up some WWII figures with the new range of Citadel Contrast paints.
So I bought all the greens, browns, tans and flesh tones I could get my hands on, and it wasn’t cheap. At close to $8 a bottle it was more than twice what I was used to paying for paint, but I have to say it was worth it. I think that these are must have paints for anyone who is looking to paint forces to a table top standard fast. And by fast I mean I’m able to paint a 750-1000 point force for Bolt Action in two days if I batch paint. Over the last few weeks I’ve painted 3 complete armies, as well as a bunch of fantasy figures that I’ve 3D printed from various Patreons and I must say I’m hooked. Now the rivet counters out there might not be impressed, as these are not and will never be exact color matches, but as we all know – there are 100 shades of fieldgrau and uniforms faded in the sun and the various rigors of the battlefield.

These paints are designed to make details pop on the battlefield so over-exaggerate the contrasts, which may or may not be your thing. For me, they are perfect and what I’ll be using for my WWII, Sci Fi and Fantasy Forces (Napoleonic players, these would be perfect for you too!)
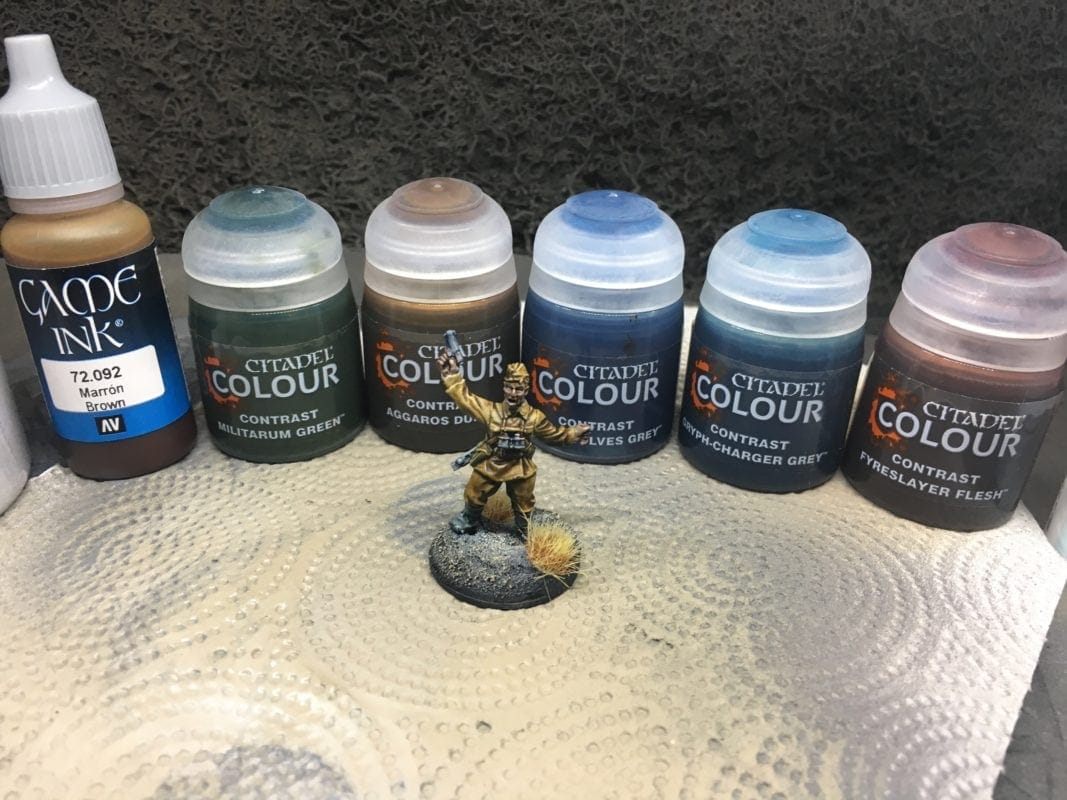
Here are my must have paints from Citadel Contrast to get you started which should allow you to paint most WWII forces. You can find these on Amazon (we’re affiliated, we earn a small amount from qualifying purchases), but they will be cheaper to buy directly from your local GW store, or better still support your independent friendly local gaming store):
- Citadel Contrast Black Templar
- Citadel Contrast Skeleton Horde
- Citadel Contrast Militarum Green
- Citadel Contrast Creed Camo
- Citadel Contrast Aggaros Dunes
- Citadel Contrast Space Wolves Grey
- Citadel Contrast Basilicanum Grey
- Citadel Contrast Cygor Brown
- Citadel Contrast Snakebite Leather
- Citadel Contrast Wyldwood
- Citadel Contrast Guilliman Flesh
- Citadel Contrast Fyreslayer Flesh
If you want to use their spray base coats (I don’t bother), or touch up paints then you’ll want:
- Citadel Base Wraithbone
- Citadel Contrast Spray Grey Seer
- Citadel Base Grey Seer
For general guides on uniforms I suggest picking up a color of Battlefronts guide (for using Vallejo paints) The Colours of War: Flames of War and Team Yankee Painting Guide, as well as The Armed Forces of World War II: Uniforms, Insignia and Organization.
US Infantry Citadel Contrast Painting Guide
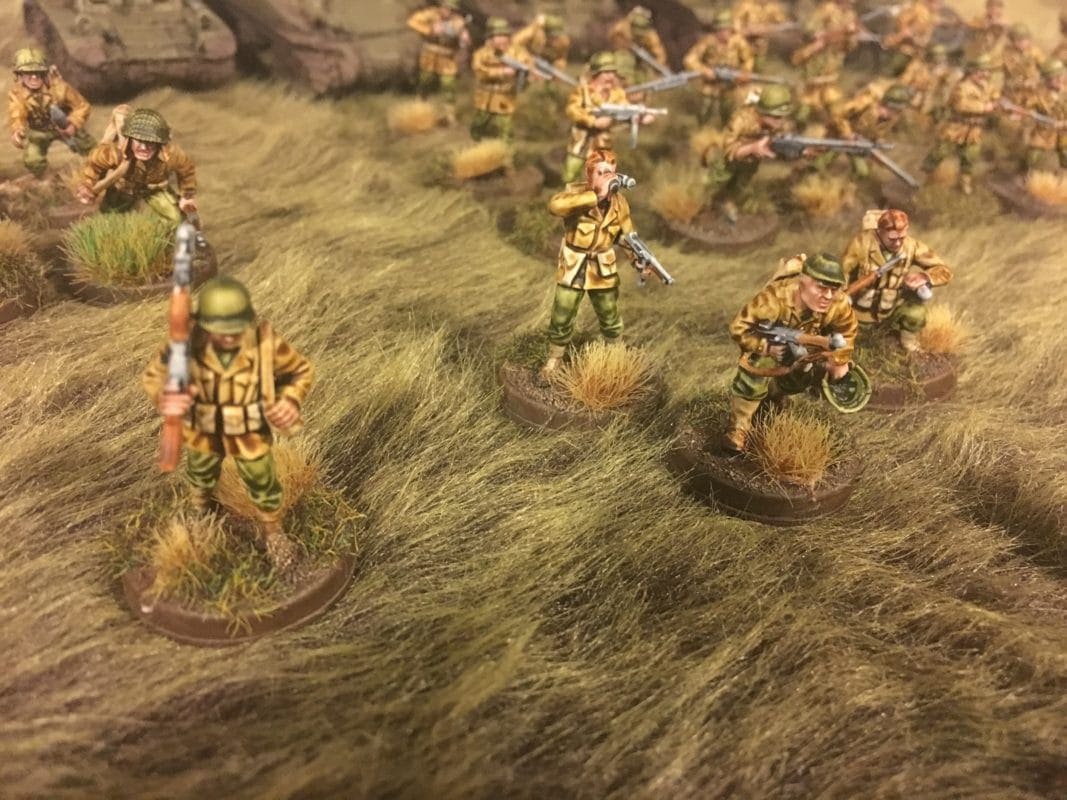
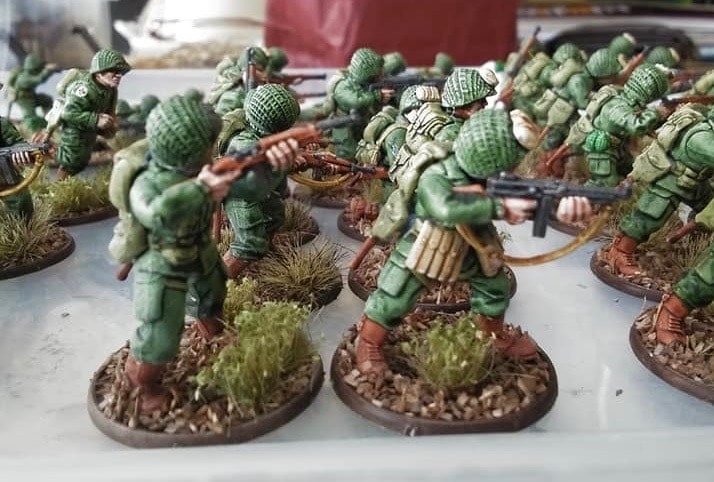
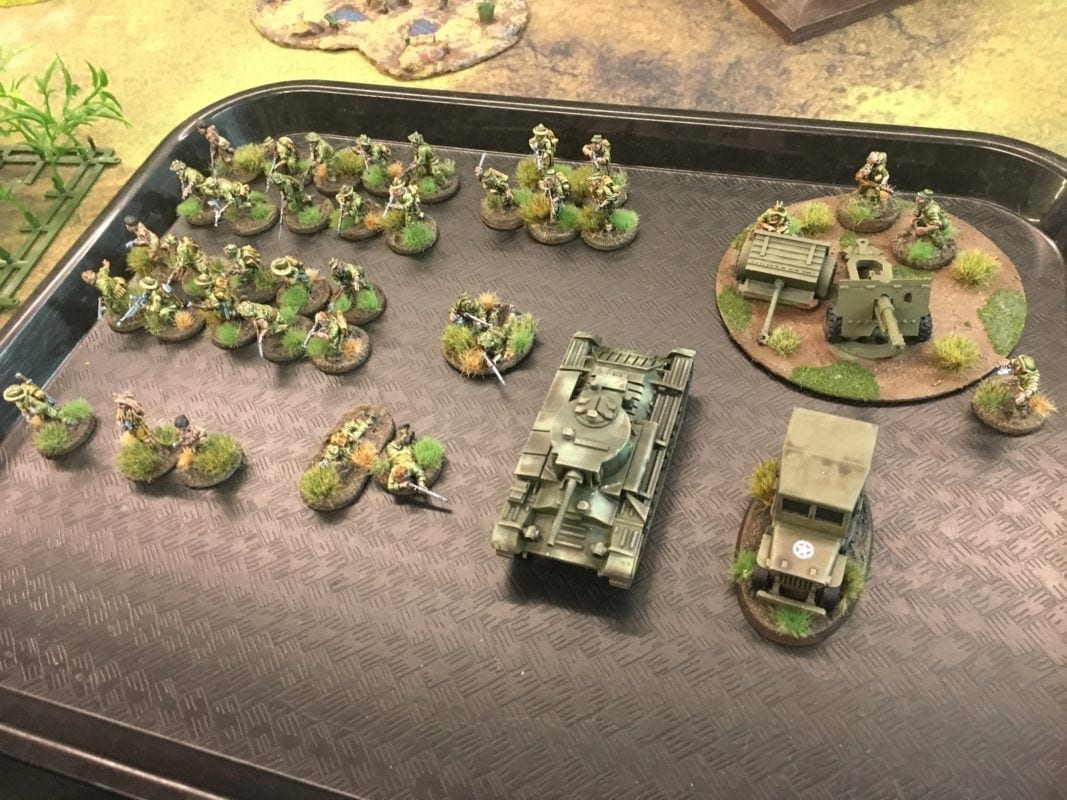
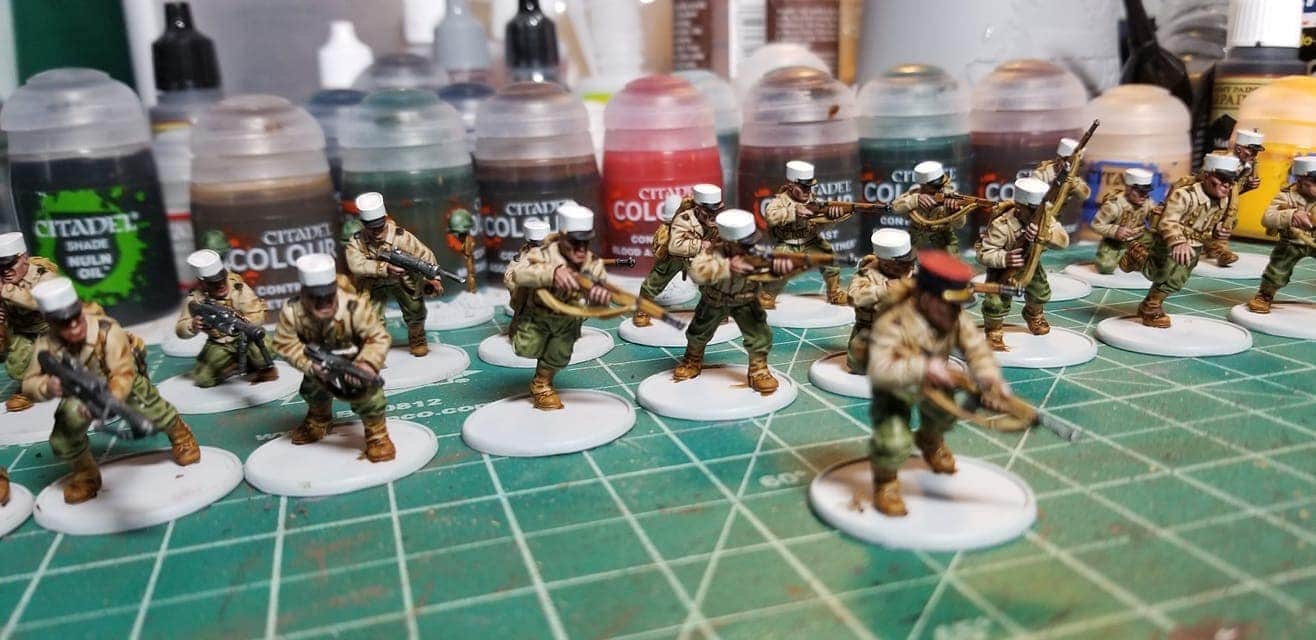
On Black Friday I picked up a bunch of cheap ($12 USD for 30 Infantry!) US Infantry box sets produced by Wargames Factory from DreamForge Games and they’ve been sitting around since then, making them an ideal candidate to get the contrast paints treatment, so I set myself a challenge, I’d build, print and paint an entire 1000 point Normandy force in 48 hours, starting at around 10pm on a Thursday, for a lunch time game on Sunday! Starting with this box, a free sprue of US Infantry from the cover of Wargames Illustrated and 3D printing a few vehicles, I was able to put together the force by using the following painting method:
- Prime with Rust-Oleum Painters Touch 2x Flat Black Spray
- Zenithal Airbrush with Vallejo 74.601 Grey Airbrush Primer
- Paint Flesh with Citadel Contrast Guilliman Flesh
- Paint jackets with Citadel Contrast Aggaros Dunes
- Paint pants and helmets with Citadel Contrast Militarum Green
- Paint Puttees and webbing with Citadel Contrast Skeleton Horde
- Paint Gun Stocks and boots with Citadel Contrast Snakebite Leather
- Paint Gunmetal with Citadel Contrast Space Wolves Grey
- Paint Bases with Vallejo Chocolate Brown
- Drybrush bases with Vallejo Iraqian Sand
- Detail bases with Army Painter Tufts and Static Grass
- Spray Varnish
Citadel Contrast paint on Amazon
US Paratrooper Citadel Contrast Painting Guide
Robert Canavan on the Bolt Action Facebook group posted up his US Paratroopers, painted with Citadel contrast paints. He used:
- Prime in either Games Workshop Contrast Undercoat Wraith Bone Spray or Army Painter Color Primer White
- Paint uniform Citadel Contrast Creed Camo
- Paint Webbing Citadel Contrast Militarum Green
- Paint boots Citadel Contrast Gore-Grunta Fur
- Paint skin Citadel Contrast Guilliman Flesh
- Paint gunmental Citadel Contrast Basilicanum Grey or Citadel Contrast Space Wolves Grey
- Paint gun stocks and wooden part of shovel Citadel Contrast Snakebite Leather
- Paint remaining pouches Citadel Contrast Aggaros Dunes or Citadel Contrast Skeleton Horde
- Paint Bases with Vallejo Chocolate Brown
- Drybrush bases with Vallejo Iraqian Sand
- Detail bases with Army Painter Tufts and Static Grass
- Spray Varnish
Citadel Contrast paint on Amazon
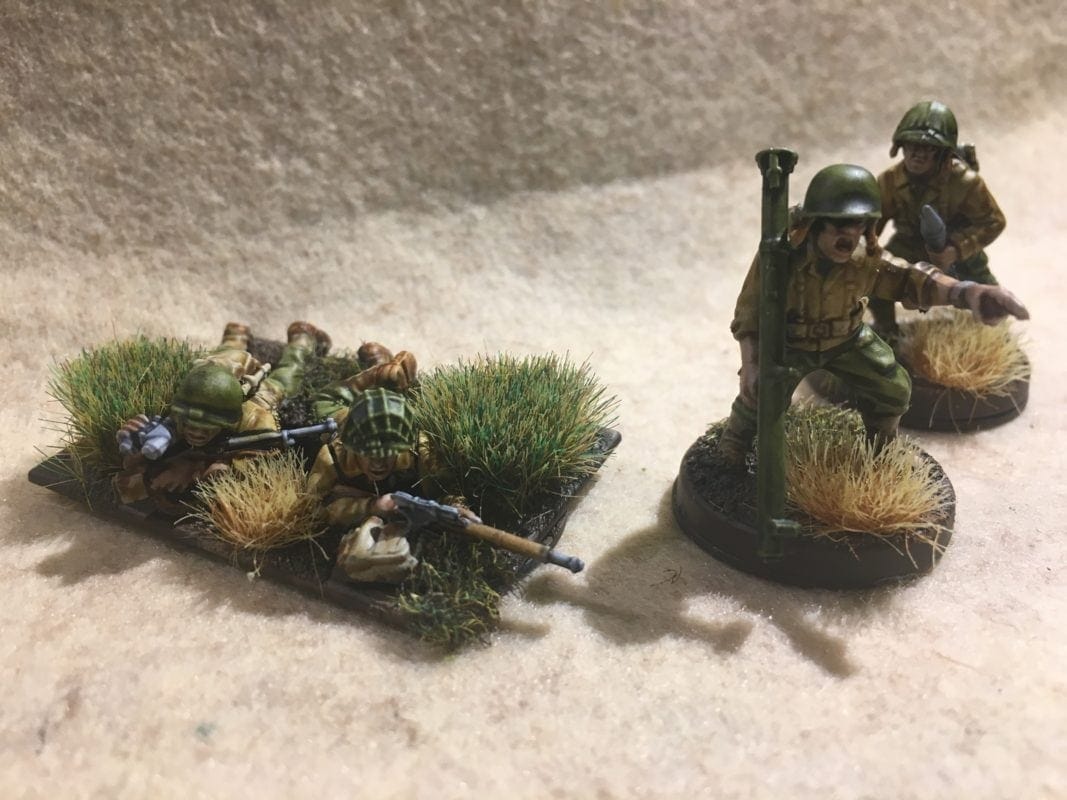
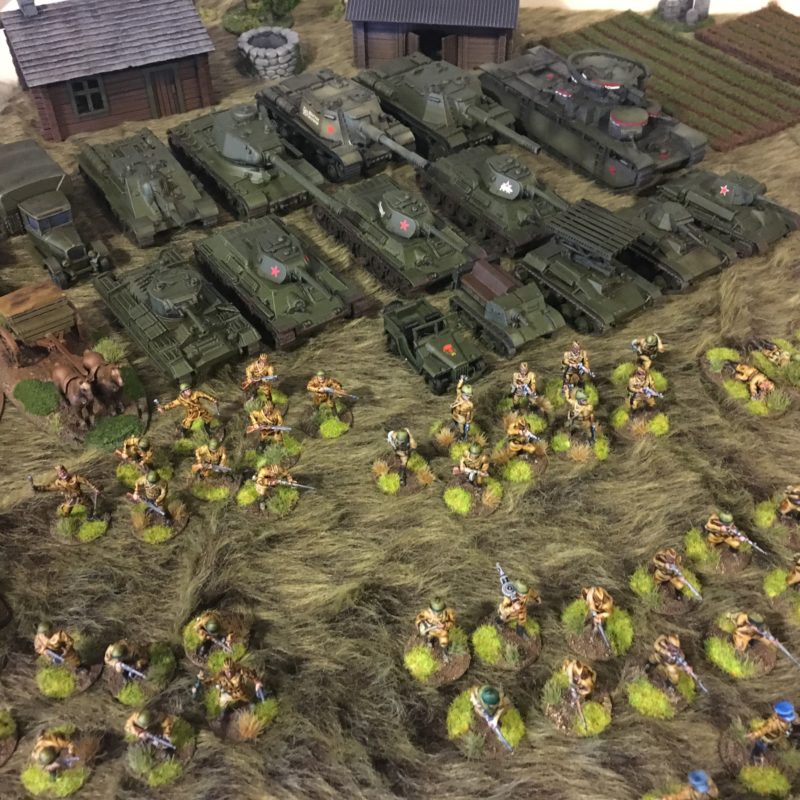
Soviet Summer Uniform Infantry Citadel Contrast Painting Guide
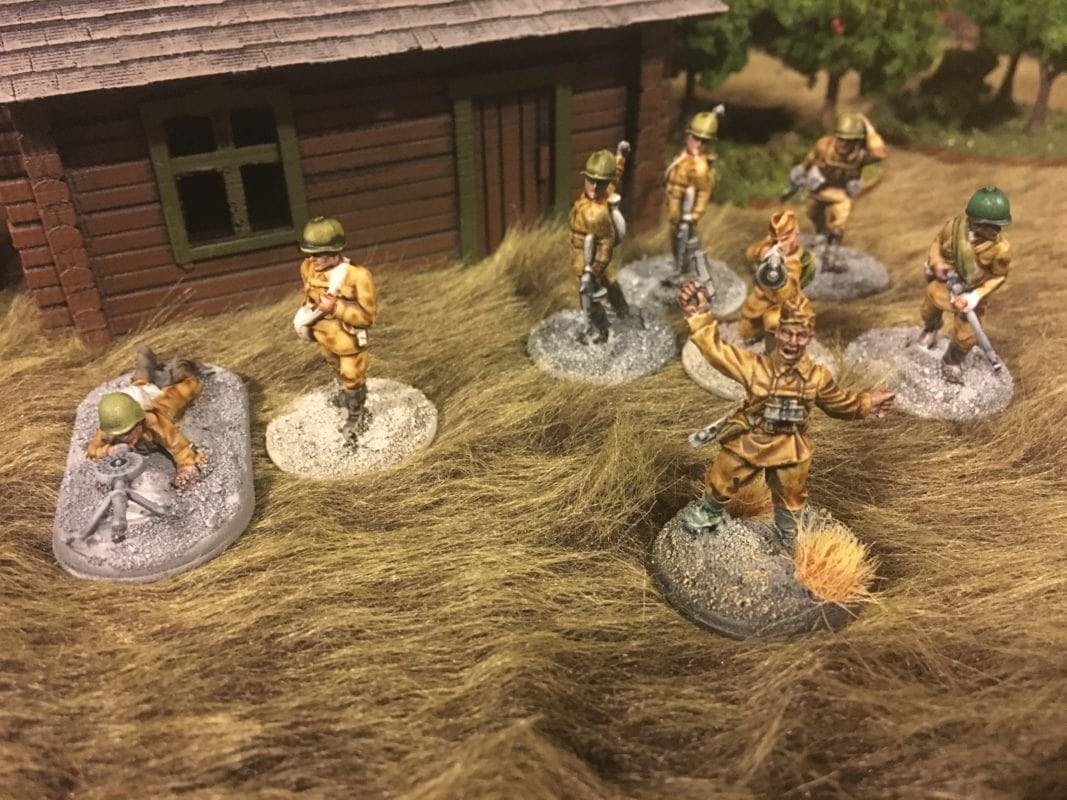
I used the following:
- Prime with Rust-Oleum Painters Touch 2x Flat Black Spray
- Zenithal Airbrush with Vallejo 74.601 Grey Airbrush Primer
- Paint Flesh with Citadel Contrast Guilliman Flesh
- Paint Uniforms with Citadel Contrast Aggaros Dunes
- Paint Guns with Citadel Contrast Snakebite Leather or Citadel Contrast Wyldwood (Wood) and Citadel Contrast Space Wolves Grey (Metal) (I substituted Vallejo Brown Ink as I didn’t have any Snakebite leather this stage)
- Paint Boots with Citadel Contrast Black Templar (I substituted Vallejo Black Ink as Black Templar was out of Stock)
- Paint Bases with Vallejo Chocolate Brown
- Drybrush bases with Vallejo Iraqian Sand
- Detail bases with Army Painter Tufts and Static Grass
- Spray Varnish
Citadel Contrast paint on Amazon
New Zealand 3NZ Division (Pacific) Citadel Contrast Painting Guide
I’ve converted up a New Zealand 3NZ Division for pacific games of bolt action (Yes there were New Zealand infantry in the Pacific, you can read about them in this excellent book “Pacific Star” by Reg Newell), these were made with a mixture of Warlord Games British Infantry, US Marines and Chindit figures, along with North Star heads in forage caps. I’ve used Osprey’s The New Zealand Expeditionary Force in World War II as a reference for these as well as photos in Pacific Star.
- Prime with Rust-Oleum Painters Touch 2x Flat Black Spray
- Zenithal Airbrush with Vallejo 74.601 Grey Airbrush Primer
- Paint Flesh with Citadel Contrast Guilliman Flesh
- Paint uniforms with Citadel Contrast Militarum Green
- Paint pouches with Citadel Contrast Aggaros Dunes
- Paint Puttees with Citadel Contrast Skeleton Horde
- Paint Boots with Citadel Contrast Black Templar
- Paint Gun Stocks with Citadel Contrast Snakebite Leather or Citadel Contrast Wyldwood
- Paint Gun Barrels with Citadel Contrast Space Wolves Grey
- Paint Bases with Vallejo Chocolate Brown
- Drybrush bases with Vallejo Iraqian Sand
- Detail bases with Army Painter Tufts and Static Grass
- Spray Varnish
Citadel Contrast paint on Amazon
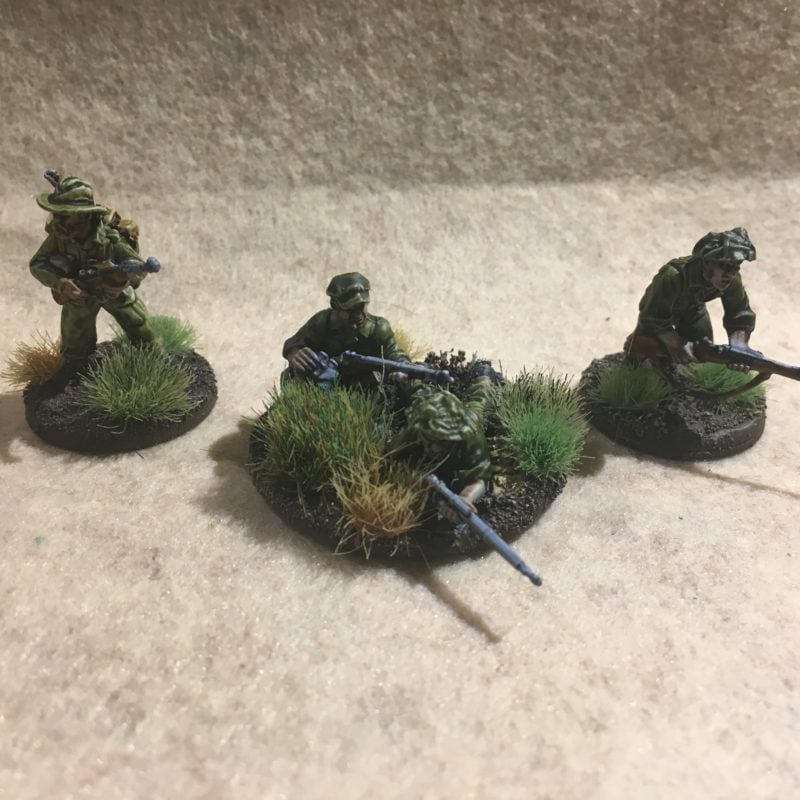
The coast watchers were painted with Aggaros Dunes and Skeleton Horde, while the natives were painted with Fyreslayer Flesh, Skeleton Horde and Black Templar.
British Late War Infantry Citadel Contrast Painting Guide
- Prime with Rust-Oleum Painters Touch 2x Flat Black Spray
- Zenithal spray with Rust-Oleum Painters Touch 2x White
- Paint Flesh with Citadel Contrast Guilliman Flesh
- Paint webbing with Citadel Contrast Aggaros Dunes
- Paint Helmets with Citadel Contrast Creed Camo or Citadel Contrast Militarum Green
- Paint Uniforms with Citadel Contrast Wyldwood
- Paint Gun Stocks with Citadel Contrast Snakebite Leather
- Paint Boots with Citadel Contrast Black Templar
- Paint Puttees with Citadel Contrast Skeleton Horde
- Paint Bases with Vallejo Chocolate Brown
- Drybrush bases with Vallejo Iraqian Sand
- Detail bases with Army Painter Tufts and Static Grass
- Spray Varnish
Citadel Contrast paint on Amazon
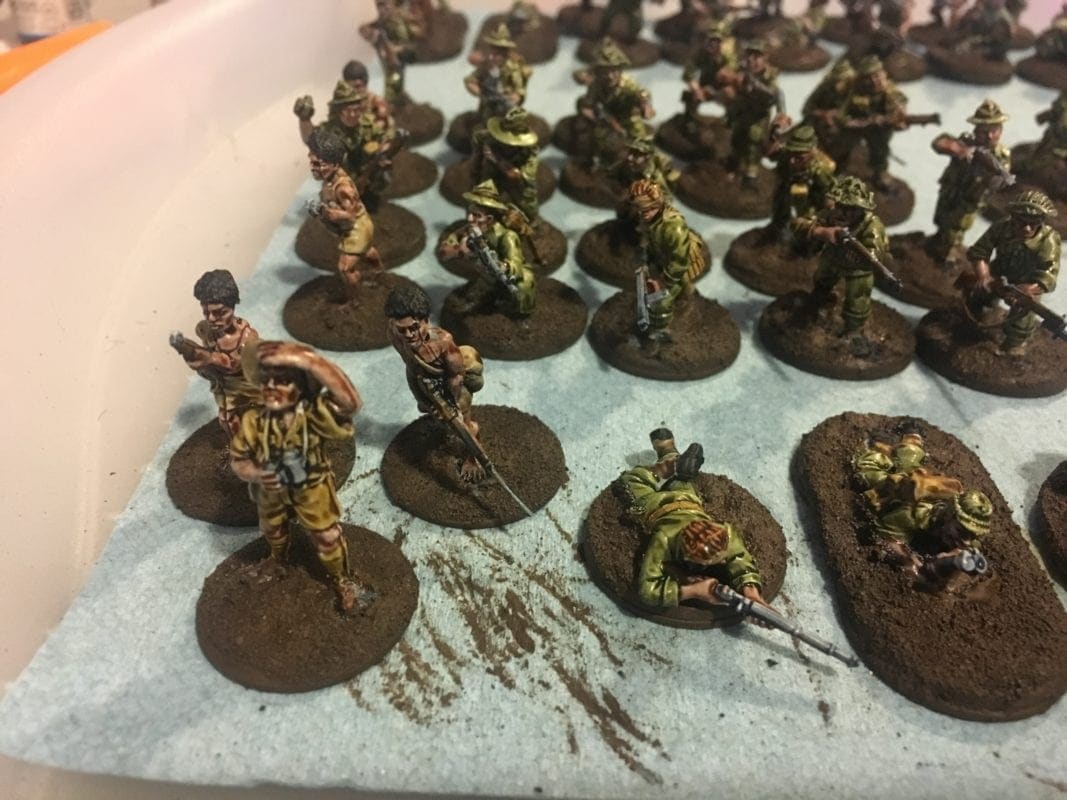
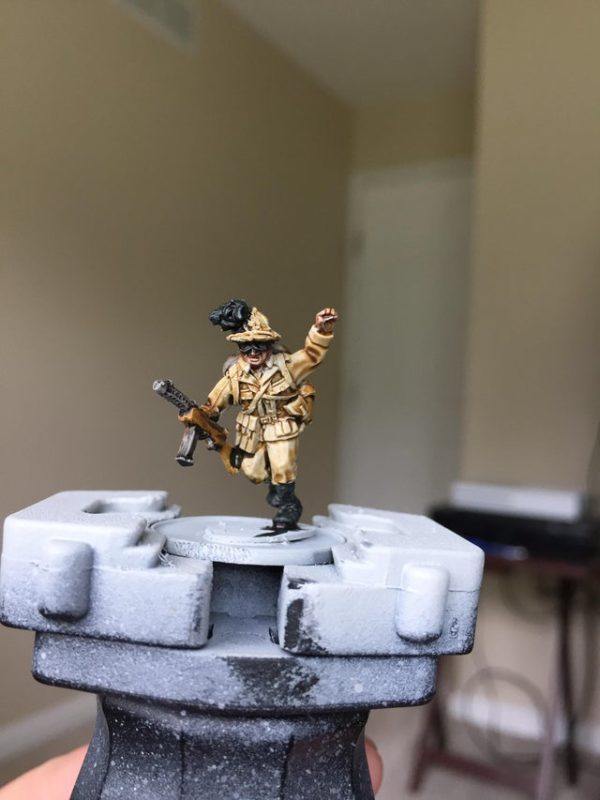
German Afrika Korps Citadel Contrast Painting Guide
I have around 2 boxes of Perry Afrika Korps which were some of the first models I painted when I got into playing Bolt Action, and they were painted very quickly with Rust-Oleum Camouflage spray primer in a sand color with a soft tone wash and some detailing, they could do with a bit of a revamp, so I decided to do a test model with the limited color palette that I had available.
I was able to paint these test models, in around 3-4 minutes each, which means I should be able to repaint my Afrika Korps infantry in a single day using the following method:
- Prime with Rust-Oleum Painters Touch 2x Flat Black Spray
- Zenithal spray with Rust-Oleum Camouflage Sand (Be very careful with this paint, if not shaken regularly the nozzle will block and it will spray on powdery ruining the models)
- Paint Flesh with Citadel Contrast Guilliman Flesh
- Paint uniforms with either Citadel Contrast Skeleton Horde or Citadel Contrast Militarum Green
- Paint Gun Stocks with Citadel Contrast Snakebite Leather
- Paint Boots with Citadel Contrast Black Templar
- Paint Gun Barrels with Citadel Contrast Space Wolves Grey
- Paint Bases with Vallejo Chocolate Brown
- Drybrush bases with Vallejo Iraqian Sand
- Detail bases with Army Painter Tufts and Static Grass
- Spray Varnish
Citadel Contrast paint on Amazon
German Grenadiers Citadel Contrast Painting Guide
One thing I’ve been struggling with is finding a good equivalent of Dunklegrau for my late war Germans. I gave Dark Angels Green a go, but it was far too bright for my liking and appears cartoonish, looking around the blogs I’ve found a color that looks about right on some Imperial Guard – a 50/50 mix of Basilicanum Grey and Creed Camo.
So, after reading the original version Troy over at Sonic Sledgehammer Painting Studio decided to give it a go, and here are his excellent results:
He’s used the following method that I intend to use when I paint my German infantry:
- Prime with Citadel Grey Seer (I will prime with Rust-Oleum Painters Touch 2x Flat Black Spray / Zenithal Airbrush with Vallejo 74.601 Grey Airbrush Primer)
- Paint Puttees/Gaiters, camo smock and helmet cover with Citadel Contrast Skeleton Horde
- Paint splashes of Citadel Contrast Militarum Green on smock and helmet cover for camouflage
- Paint splashes of Citadel Contrast Wyldwood on smock and helmet cover for camouflage
- He recoats the flesh with Wraithbone to make it brighter, I’ll probably skip this step
- Paint Flesh with Citadel Contrast Guilliman Flesh
- Paint Boots with Citadel Contrast Black Templar
- Paint Uniforms a 2/1 mix of Citadel Contrast Basilicanum Grey and Citadel Contrast Creed Camo
- Paint Gun Stocks and water bottle cover with Citadel Contrast Snakebite Leather or Citadel Contrast Wyldwood
- Paint Gun Barrels with Citadel Contrast Basilicanum Grey (I use Citadel Contrast Space Wolves Grey)
- Paint pouches with Citadel Contrast Militarum Green
- Paint suspenders with Citadel Contrast Cygor Brown
- Paint Bases with Vallejo Chocolate Brown
- Drybrush bases with Vallejo Iraqian Sand
- Detail bases with Army Painter Tufts and Static Grass
- Spray Varnish
Citadel Contrast paint on Amazon
French Foreign Legion Citadel Contrast Painting Guide
In a post asking for photos of Foreign Legion forces in the Bolt Action Facebook group, some great photos were posted by Winter Guite and are made by combining “Warlord US Army with heads from Mad Robot. These represent the FFL that were equipped by the US under the 1943 ANFA plan.” It looks like he followed a very similar process to my US Army guide above.

From what I can tell, he appears to have used something similar (my suggestions) to the following process:
- Prime with White or Citadel Contrast Grey Seer spray paint
- Paint the Jackets and Puttees/Gaiters Citadel Contrast Skeleton Horde
- Paint the pants either Citadel Contrast Militarum Green or Citadel Contrast Creed Camo
- Paint the Kepis Citadel Contrast Apothecary White
- Paint the Kepi Brim Citadel Contrast Black Templar
- Paint the Sergeants Kepi Citadel Contrast Blood Angels Red
- Paint the Gold on the Sargeants Kepi Citadel Contrast Nazdreg Yellow
- Paint the Gun stocks Citadel Contrast Snakebite Leather or Citadel Contrast Wyldwood
- Paint the Gun metal with Citadel Contrast Basilicanum Grey or Citadel Contrast Space Wolves Grey
- Paint the webbing Citadel Contrast Aggaros Dunes
- Paint the skin Citadel Contrast Fyreslayer Flesh or Citadel Contrast Guilliman Flesh
- Paint Bases with Vallejo Chocolate Brown
- Drybrush bases with Vallejo Iraqian Sand
- Detail bases with Army Painter Tufts and Static Grass
- Spray Varnish
Citadel Contrast paint on Amazon
Italian Bersaglieri Citadel Contrast Painting Guide
Gavinthekaiser on reddit’s r/boltaction forum posted his Italian Gavinthekaiser painted with Citadel Contrast Paints in what might be one of the simplest, but effective paint schemes out there so far.
- Prime with Rust-Oleum Painters Touch 2x Flat Black Spray
- Zenithal with White or Citadel Contrast Grey Seer spray paint
- Paint Flesh with Citadel Contrast Guilliman Flesh
- Paint uniforms with either Citadel Contrast Skeleton Horde
- Paint Gun Stocks with Citadel Contrast Snakebite Leather
- Paint Boots and feathers with Citadel Contrast Black Templar
- Paint the Gun metal with Citadel Contrast Basilicanum Grey or Citadel Contrast Space Wolves Grey
- Paint Bases with Vallejo Chocolate Brown
- Drybrush bases with Vallejo Iraqian Sand
- Detail bases with Army Painter Tufts and Static Grass
- Spray Varnish
Citadel Contrast paint on Amazon
Conclusions
The new Citadel contrast range of paints are a pleasure to work with, and are now my “go to” paints when dealing with any rank and file troops, you simply cannot bear an average of 5-10 minutes per figure and will result in many boxes of minis actually getting painted and making it onto the table in my household.
While I’ve been off work I’ve been painting a 1000 point bolt action force in around 3 days, which would normally take me around 3 months and not look anywhere near as good.
I can see me using these for virtually any horde type army in putting together. At $7+ they aren’t cheap (I’ve been paying around $10 including shipping to get colors that were out of stock locally), and I’m happy to pay that, considering there have been certain army painter paints that were a waste at $3. That’s saying something. I plan to fill out my range with more colors and give some other formats like Napoleonics soon too (imagine, painting red with ease!)
It sure isn’t tartan paint, but its close…
Have you painted other WWII or Historical Forces with Citadel Contrast Paints? Let us know how it went in the comments!
I’ve been painting up some Prussian musketeers for Seven Years War with the Contrast paints. The colors straight from the pots work well for these uniforms, which were quite colorful. I’m no lover of GW, but I think they have a good product here and I’m going to stick with it, at least for a bit. I just wish they weren’t so expensive, but if they were cheap, they wouldn’t be a GW product. I need to do an early war German force for Bolt Action/Chain of Command, so I’ll be looking forward to that update to the article!
Awesome, thats a period that I’ve never personally gamed before, so I know very little about it. What combinations are working for you? Do you have any photos of the end result?
Hi, there!
I went and tackled the German infantry using this set of guides as a basis. I didn’t end up doing any fancy zenithal priming, but the end result came out pretty well, I think: https://youtu.be/QMvyM52DChw
I think the feldgrau mix works better with more grey than a straight 1:1 grey and green once it’s actually on a miniature, but that’s really just personal preference. I’d considered using straight Basilicanum Grey for the German uniform and then hitting it with some thinned down Athonian Camoshade, but this seemed like it’d save some time overall with just one application and I quite like the finished product.
I absolutely love this, just watched on the train from DC to New York for a meeting. I’ll update it when I’m back home tonight? Trying to pick the accent – kiwi or Aussie? I’ve been away from NZ for so many years it’s hard for me to tell these days!
Also I think I’m going to have to buy a box of grenadiers and paint them up like this, now I need some cygor brown!
I’m a Kiwi boy originally! Been around the world a little while as well, so my accent’s gone a bit sideways over time. I imagine I’d probably struggle to place yours once you’ve done a wander, too – typical magpies, us lot!
Cygor Brown was an instant win, probably one of my favourites from the range. Anything that you want dark leather? Done in a single coat, and it covers over aaanything. A great colour for hiding any last-minute sins!
Ahh same here, looks like I’m from an hour north of you in Pukekohe, though two years in Thailand, 3 in San Diego and 2 more in DC and who knows haha
This is a fantastic article. Thanks for putting in the time to document ALL the different forces. I’m still experimenting with Contrast but this information has given me a lot to work with. Thanks!
Awesome stuff. I was just getting out a few historical minis to try the contrasts and ran across your article. I’ve been using them for other projects (Blood Bowl, The Walking Dead, Fallout) and I absolutely love them.
But the big question for me has been how to use them on historicals – particularly WW2. Your detailed info here is outstanding and I thank you very much!
Indeed great article. I would like to tackle Japanese with Contrast Paints. Anybone done this already and what paints did you use? Info greatly appreciated.
Henk
I’ve painted 28mm Perry Plastic AWI, both British and American. Blood angels red works great right out of the bottle for British red( would for napoleonics too). For Continental uniforms I use 4 parts Talasar Blue to 1 part Ultramarines blue. that give a slightly but noticeably darker blue. the apothecary white is a godsend for armies with predominantly white breeches like French and Russians, or full white uniforms like Austrians.
I am painting some early war AWI units in brown and green coats. I’m using 1:1parts ork flesh and dark angels green, for green, and 1:1 Snakebite leather to Cygor brown for the brown coats. and i use Black Templar for all black stuff like head gear(bicornes, tricornes, and shakos), Boots and cartridge boxes. its brilliant! I even use thinly applied space wolves grey contrast paint for the british artillery and limbers!
Step 4 for the Bersaglieri says either Skeleton horde “or” but there’s not a second option. What is it? looks like a nice way to knock out some desert troops fast!
This is incredible! Do you have more pictures of your US forces anywher?
Hi mike, I’m posting more of my adventures with contrast paints over on Instagram at: https://www.instagram.com/paintwithcontrast/
What color did you use to paint the soviet helmets?
Can’t remember, most likely dark angels green, militarum green or creed camo
Hi, thanks for the info. What color do you use for the canvas gear for the Soviets?
Great article! I too am experimenting with contrast and now I hear that Army Painter is coming out with their own version of it. I am painting 3d printed Spanish Reconquista figures from Caballero Miniatures as well as ACW from Eskice (he has a painting guide for 15mm ACW in contrast). I have started experimenting with British Napoleonics – the Blood Angels red is perfect. What I found is that the White Rustoleum is pretty stark so I bit the bullet and bought a can of the Citadel primer to try that. I am not sure I want to add the zenithal step for 15mm.
Hi,great post so far.
What contrast colors would you recommend for painting japanese infantry? any suggestions?
Thank you for your kind comment on “Pacific Star” and doing a Bolt action 3NZ Division army.Excellent painting and I am totally chuffed that you have honoured the Kiwis that fought in the South Pacific.I have also written “Operation Goodtime-the Invasion of the Treasury Islands,27October 1943″I think that Goodtime provides good Bolt Action scenarios-the amphibious landing at Falamai,the vicious close quarter fight at Soanatalu and the Battle at the Caves.
Your US infantry posted first are an abomination, ’43 jackets painted in paron’s jacket colours. Hopeless.