The complete idiots guide to Chinese “K40” Laser Cutters for Wargamers

As an Amazon Associate Wargaming3D.com will earn from qualifying purchases.
A month of so ago I purchased myself one of these big blue “K40” style Chinese laser cutters from Ebay, and over the last few weeks I’ve been working towards getting it usable for cutting and engraving MDF and Acrylic plastic for a wide variety of miniature wargames products: from Tokens and Templates to Terrain.
It’s been a massive learning curve, and there’s plenty of things that I wish I knew going in, things I would have done differently, and other tips and tricks that I’ll aim to put together in one resource to make it easier for those who are looking to add a laser cutter to their list of toys (in addition to FDM and Resin 3D printers) for miniature and tabletop wargaming.
Hopefully this will become the essential resource or wargamers who are looking to purchase a K40 style laser cutter with everything all in one place. I’ll aim to keep it updated as I learn more, things go wrong, things get fixed and things get upgraded, as is usually the case with these cheaper Chinese made products. If you see something that should be changed, improved or updated, feel free to email me [email protected] or comment at the bottom of the page.
So what is a K40 Laser Cutter/Engraver?
The “K40” Laser is a catch all term for the blue (and sometimes red), water cooled Chinese made lasers you find for around $300-400 USD on Amazon and Ebay. There is no single manufacturer or official design spec for these, and they are all slightly different, but work on the same or at least very similar principles, a blue sheet metal box, containing an (allegedly) 40 watt laser (but usually closer to 30 watts), using roughly similar controls (some are analogue, some are digital), and with roughly similar connections.
The legend goes that these Laser Cutters were originally created for engraving Japanese Hanko stamps (A rubber seal that is used in place of a signiture in Japan, of which the average person has four different ones – Ginkōin (銀行印), Jitsuin (実印), Mitomein (認印) and Sanmonban (三文判) depending on the purpose), which is why they have an incredibly tiny clamp in them that is useless for absolutely anything except this purpose. Which means, we are using it for something that isn’t it’s intended use – but it’s not like that’s stopped wargamers before!
Basically, it’s a crapshoot when you purchase one of these – and that’s something you need to be aware of before reading any further. You are not going to get a $4000 Glowforge for only $300, it’s not going to work correctly out of the box (unless you are incredibly lucky) nor are you going to end up with a $10,000 commercial laser, but with a bit of tinkering, a lot of patience, some wasted practice materials and some decent beer for your sanity, you’ll end up with a project that works, can pump out a tonne of useful things, and you’ll learn a lot in the process.
When it comes to the actual laser cutter, I’m not going to suggest a particular seller, as I don’t want to take any responsibility for your purchase, as sellers pop up and disappear all the time, like you get for the cheap clones of popular 3D printers in kitset form. I strongly suggest reading this buyers guide before making any purchase.
I purchased mine from eBay, which in hindsight was probably the wrong choice, but I was strapped for cash and didn’t really know what I was doing so stupidly purchased the one with the most “upgrades” not realizing that these were mostly shiny bells and whistles that I didn’t need, and in the case of these, the simplest on is probably the best. If you are in the United States, then definitely go down the Amazon route, as you’ve got some buyer protection. Otherwise eBay or Alibaba are your options, just be prepared that if you are purchasing from overseas that you might get stung for shipping or import taxes and duties which could cost as much as the laser cutter itself.
If given the choice between a digital Ammeter and a Analogue one, go for the Analogue one, as you’ll want to read the actual current going through the machine, rather than a % and you’ll need to add an analogue gauge anyway. Some of them have different focus lengths, meaning they are out of focus straight out of the box, I don’t see this to be a huge issue, as seeing as these all have non adjustable Z axis, they are all going ot be out of focus anyway, as these were never really intended for what we are using them for anyway!
Amazon Options:
2021 Update: Since originally posting this, the number of K40 printers still available on Amazon has dropped a quite a bit. We’ve left some of the names listed in case you’d like to look for them elsewhere.
- Orion Motor Tech 40W CO2 Laser Engraver Cutter with 12 x 8in Work Area, Desktop K40 Laser Engraving Machine with Digital Control, Red Dot Pointer, Detachable Wheels, Compact for DIY Home Office – Note that this is a different model than what we originally listed (which is now currently unavailable). While it now comes with a digital control panel by default, it is still similar to the previous models.
- Laser Cutter-SUNCOO K40 Laser Engraver DIY Engraving Machine for Wood, Glass, Acrylic 40W CO2 with Air Exhaust Fan USB Port Only for Windows System 12×8 Inch (Blue) – this one looks to be good, but it does have a 1″ focal length rather than a more common 2″, so it’s going to be out of focus straight out of the box. This isn’t a huge issue, as you’ll want to ad an adjustable Z anyway.
- SUNCOO K40 Laser Cutter 12×8 in Desktop DIY 40W CO2 Laser Engraving Machine Glass Wood Leather Acrylic Cutting Machine with Air Exhaust Fan USB Port for Windows System Red – as above, with the 1″ focal length.
- Iglobalbuy 12″x 8″ 40W CO2 Laser Engraving Machine Engraver Cutter with Exhaust Fan USB Port Laser Cutting Machine with Movable Wheels – This looks to be similar to mine, with the digital guage, so you’ll need to add an analogue gauge.
Other Options:
- Find a K40 Laser on Ebay (Mine came in 3 Days)
- Find a K40 Laser on AliExpress (expect shipping to take a while, you’ll have to pay taxes, and good luck with after sales service)
Where to go for help with your K40 Laser Cutter?
Trust me, as a person getting started with one of these, you are going to need support, and lots of it. And don’t expect any from the seller, as depending on who it is, once it arrives, you are pretty much on your own. And don’t expect the manual to be any use either. The good news is, these things have been around for close to a decade now and there is a tonne of support for them in a wide variety of Facebook Groups, on Reddit, and websites like K40.se. Here are the places you’ll want to start hanging out and asking questions (and you’ll get to see all the silly questions I asked when I got mine):
- K40laser.se – you’ll want to spend a good amount of time reading this while waiting for it to arrive.
- LaserGods.com – another great resource for K40 and similar lasers
- Chinese K40 Laser Group – about 10,000 users on Facebook are in this group, great for instant support and suggestions.
- K40 Laser machine Group – about 5,000 users on Facebook in this group.
- That Dude with a Laser – 7,000 person group focused on Laser gutters in general
- /r/chineselasercutters/ – the reddit home of these (in)glorious machines
- Find some poor soul that you know who already has one and bug them all day on facebook (Sorry Bruce and Christopher!)
How safe is a K40 Laser Cutter – Will one of these kill me?
Potentially, yes if you are stupid, no, if the gods favor you and you follow reasonable safety precautions. If you are the sort of person who doesn’t wear gloves when using resin on your Anycubic Photon, puts a fork in the toaster, or is the reason we need safety labels on everything in California, then one of these isn’t for you. If you are a functioning human being, who can follow instructions and is reasonably competent at not doing stupid stuff, you should be able to use one of these without disaster. I strongly suggest you watch the following video to get an idea of some of the safety issues faced when using a K40 style laser cutter:
After all, they are Chinese made machines, with virtually zero quality control, that involves using water, lasers and electricity (what could possibly go wrong?), being sold to literally anyone, that is knocking off something that usually costs thousands, for a few hundred dollars including shipping.
Because of this, you do need to take some very sensible safety precautions to prevent the following risks:
- Electrocution: Depending on which one you get, it can either be (reasonably, I’ll get to that) safe, or a complete and utter death trap. Out of the box, even the ones that are properly grounded, aren’t.
- Fire: You are using a laser that is literally burning through wood, I managed to set my 3D printed air assist on fire by being an idiot. These aren’t 3D printers that you can set to run and walk away, you need to be watching them at all times while they are running.
- Laser: You are shooting laser beams, this means keep the door closed on the unit, don’t put your hand in it, make sure mirrors are aligned so you aren’t shooting lasers out of the casing (been there, done that, and still have a wound on my finger a week later), essentially don’t be an idiot like me! These are not toys, and need to be treated with respect.

Earthing it so you don’t kill yourself.
One of the potential issues with these is how the machines are (or are not) earthed. Think of it this way, you have a piece of 110 (or 240 if you live outside of the USA) volt equipment, that has been made to a variety of different standards (or none at all), to be as cheap as possible. Throw in the water cooling, and sheet metal, and you have something that has the potential to electrocute you. The first thing you are going to want to do (before you power anything on) is open up the box and see if it has been properly earthed/grounded either externally if you have a two prong power plug, or if it has been set up properly to do so via the mains socket if you have a 3 prong plug.
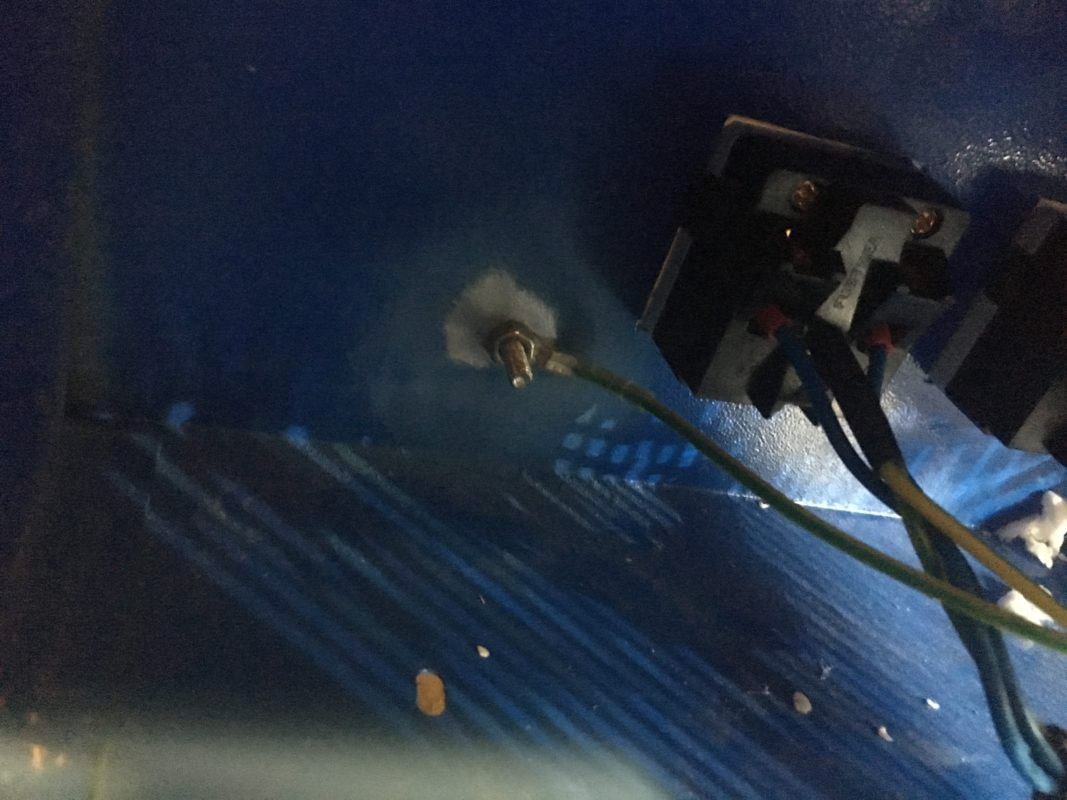
You’ll notice that the chassis hasn’t been earthed properly the minute you open it up, instead the current grounding wire is there for purely cosmetic reasons, or those that are making these and selling them, either don’t know, or don’t care about the basics of electricity. Remove the screw that connects to the earth, and sand all of the paint off the chassis inside to ensure that it has good contact, once that is done put it back in. Now you will either earth it to an external source (look for a green wire usually near your circuit box, or attached to the water pipes) or via your 3 prong plug. If using the 3 prong plug, use a multimeter to test it actually earths correctly. Doing this could save your life, and prevent either electrocution, or your house burning down! Thankfully, mine was properly earthed via the mains, and just required sanding.
What should I replace when I get one?
You might notice a common theme in this article, that is: these machines have had a lot of corners cut seriously to keep costs down, and we are using them for a purpose other than what they were originally intended for (because we sure as hell aren’t engraving Japanese name stamps). This means that you should expect to budget more on things that are both “nice to have” and “need to have” to improve safety, performance and quality of life. That is – if you value your life (and your pets, spouse and children), possessions and sanity. Some of this will depend on if it’s “upgraded” (and if it’s been upgraded properly), but here are the things you are probably going to need to buy/replace or upgrade off the bat, or reasonably soon after purchasing.
NEED TO HAVES:
- Safety glasses that are rated for the laser (Highly recommended, though I don’t have any – yet) – The first ones I purchased off Amazon, weren’t rated for the laser even though the description said they were, so as with everything mentioned here, buyer beware. As most of these are again sourced from China and sold by third parties, I’d suggest sticking with a known brand in the space like Cloudray.
- A bucket or similar water reservoir (Must Have) – All you need is a 5 gallon bucket with lid form Home Depot or Lowes.
- Ducting, 4″ joiners and an outlet (replace ASAP): What you get with the machine is utter trash and needs to be replaced immediately.
- Extraction fan (replace ASAP, though I’m using mine currently): You’ll want to place this at the end of your hose (close to the outside).
- Analogue mA Meter (If you have a digital “upgraded” display): Based on feedback from people, the digital displays are notoriously unreliable and inconsistent, with 15mA being anywhere from 30-90% depending on which laser cutter you are using. If you want your laser tube to last the distance, you need one of these ASAP to make sure you aren’t overpowering your laser. Most people like the 30mA meter, as 15mA displays right in the middle.
- The included water pump (depends on the quality, mine seems to be ok, others have terrible ones) – Make sure you get one that’s powerful enough to send the water vertically up to the laser tube, some of the ones aren’t powerful enough out of the box.
- A Fire Extinguisher: Epilog recommends CO2, and any workshop that deals with 3D printing should already have one of these. You have one already right?
NICE TO HAVES:
- A 4″ Lab Jack (Highly recommended) – Most of these will have a focal length for the laser of 1″ or 2″ out of the box, but the machine comes with a bed and a clamp that isn’t adjustable, meaning that the laser won’t be hitting your 3mm MDF or Acylic in the optimal point unless you are incredibly lucky. This leaves you with some options, such as shimming, adjustable laser heads, or a lab jack. I’ll start off using a lab jack, but I think ideally I’d like to go down the adjustable head route.
- The included bed (replace with a Honeycomb style one or similar): I’ve seen varying suggestions on what to us for a bed, some suggesting honeycomb, others using sacrificial 3D printed beds (which scares me after setting a 3D printed part on fire), while others using floor tiles on top of the 4″ lab jack. I’ll update this once I’ve had more experience with mine, but I’m currently using a honeycomb bed. If ordering make sure the size fits the size of your bed!
- An “Air Assist” (Optional, but recommended) – I’m currently in the process of putting this together, and will update the article accordingly once I have one. These blow air which helps to prevent smoke from blocking the laser beam, allows for better cuts, prevents fires etc (warning: the one linked here uses an 18mm lens which would also require different lenses). There are 3D printed options, which are more than adequate if you have access to a 3D printer, just note that if you have one of these you must ALWAYS use the air assist as otherwise they will catch fire – I learned that the hard way.
- Flexible Tubing (If you get an air assist) – This is to connect the air assist to the air pump.
- An Air Pump (If you get an air assist) – This is to blow air into the air assist.
- A Drag Chain (optional, if you put in an air assist) – This will help keep your tubing out of the way of the laser beam, ensuring you don’t cut your air assist in half, and set something on fire! Others have made do with clips and strategically placed cable ties, but this is far cleaner/safer.
- A kill switch for the lid (optional): This is to prevent you from having the laser fire while the lid is open, and shooting yourself with the laser. I’ve done it. It hurts. A LOT!
- A “CW-3000” Water Chiller (or you could just put frozen bottles of water in your reservoir like I plan to): These are chillers designed for use with laser cutters. Though just like the K40, they are all clones of whatever the original design was, so you are rolling the dice with these, and quality may vary. Check the reviews first and purchase on Amazon, so you can return if its no good.
- A sturdy cart to put everything on – If you are like me and want to be able to move yours around (which makes it easier when it comes to aligning your mirrors, maintenance etc, then you’ll want a sturdy cart that is big enough to hold not only your K40, but your water reservoir, any pumps for your air assist, your water chiller if you have one, your laptop and of course all your spare parts and wood/acrylic. Don’t get the ones from Harbor Freight, they are flimsy sheet metal, the heavy duty plastic ones are far stronger and more stable.
And these things should be thrown out as soon as you get it:
- The Manual – It’s written in chinglish and doesn’t make any sense, nor does it match the actual machine specifications half the time.
- The included pirated software and usb dongle.
- The Ducting – the included ducting is complete rubbish and will fall apart on its first use.
- The Castors/Wheels (Optional) these really aren’t needed, and you’ll have a far more stable laser cutter when its flat on your table or cart. After all, you wouldn’t mount a 3D printer on wheels with all those moving parts!
Setting up the water cooling
As mentioned earlier these laser cutters are water cooled. Ideally you want to keep the water around 15-20 degrees celsius maximum (Some suggest aiming for around 18c for optimal power output and extending the life of your laser). If you are like me and purchased and “upgraded” laser cutter you will have a temperature read out on the machine, the only issue with this is the placement of it which is in one of the hotter parts of the tube. I put a second digital temperature gauge in my bucket of water so I could measure the temperature at the source as well. When you first get your machine, you are going to want to get it up and running as soon as possible.
To create mine I simply went down to Home Depot and purchased one of those large orange buckets, cut a hole in the top for my tubes, filled it with water. Make sure you plug the pump into a proper outlet (I wouldn’t trust the ones on the back of the machine in case they fail, plus you want to run it a bit before and a bit after running the machine to keep it nice and cool).
In order to keep the water cool you have two options, either purchase a water chiller that will run your $100-150, OR get some bottles of water and stick them in the freezer. Add them to your bucket like giant ice cubes and then refreeze them after you’ve finished running your laser cutter. For now I’m using the frozen bottles method, but as I start using the machine more consistently I plan to upgrade to a decent chiller.
You’ll end up using:
- A 5 gallon bucket or similar water reservoir and a water pump (you may want to replace the included one, depending on what you get)
- Frozen water bottles OR A “CW-3000” Water Chiller
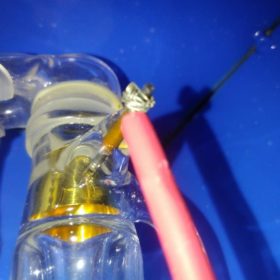
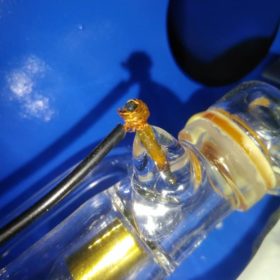
Aligning the lasers on a K40 Laser Cutter
This is one of the most time consuming parts and most frustrating when you first get the machine. It drove me absolutely bonkers when I first got my machine, and I’d guess that 90% of your problems will be caused by misaligned mirrors. Chances are that the lasers were aligned roughly correctly when the laser left China, and there’s even a good chance that the worked correctly when they left the US or Europe based warehouse, but by the time it gets to your house, you can bet that the mirrors, and therefore the laser beam is completely out of alignment.

It’s a long process to get the lasers aligned, and every time you change something on the alignment you need to go back to step one. In the end I had to Facebook call someone with more experience than me to step me through it over a course of two nights. Once I got it locked down it was worth it.
Remember, everything is about alignment, if your mirrors are out of alignment, its going to drastically reduce your output power, meaning you’ll end up overpowering the tube and greatly reduce it’s operating lifespan, so make sure you do this correctly. You’ll need to adjust the first mirror to ensure its landing dead center on the second mirror, then the second mirror to ensure its landing dead center on the laser head, and just when you think you have that correct, you’ll need to test it at different spots on the gantry – and it’s going to move, meaning you’ll need to readjust the mirror height (with shims, or bending the attachment if its not straight), then back to step one again.
You can read the “Ultimate Guide” here which a lot of people swear by. I however faced serious problems using this guide (most likely due to the way it was written more than anything, and it just didn’t seem to “work” with my brain. So I reached out for help on various Facebook groups and spent a few hours on the phone with John Cabrer in California, who walked me through the entire process using Facebook Messenger video. Personally I recommend the video below, he’s working on a shorter one, that’s shot in landscape format to make it easier.
Do yourself a favor and make a point of watching this for an excellent description of how to align the lasers for maximum cutting power:
In order to align mine properly, I had to do a bunch of stuff first, including removing and realigning the gantry, removing the mirrors so the locknuts would come loose, replacing the screws with hex nuts that actually held Mirror 1 onto the bracket (mine literally moved around loose) etc. I find that this method is much easier, as you get the laser shooting in straight lines, then adjust the physical placement of the mirrors to get everything centered.
Use whatever process works for you, but bear in mind that if one doesn’t work, don’t give up and try the other. I still strongly recommend Johns method as I was able to do it without the need to shim, and found it far easier to adjust.
Also, it’s worth remembering that if you use masking tape, that it will foul the mirror if you shoot it with a laser, so put something like a small coin behind it to prevent this from happening. That’s something I didn’t know to begin with.

This is why it’s an idiots guide – I’m an idiot. And a helpful reminder that these are *dangerous* if you don’t follow proper safety practices. Aligning the laser is probably the most dangerous situation you’ll get into with one of these though (if you properly ground the laser). I must once again stress how important safety is at this point. Chances are that when it arrives, it’s been thrown around in transit, your stuff is out of alignment, meaning the laser out of the box could be pointing absolutely anywhere if its misaligned. I learned this the hard way, and managed to accidentally shoot my finger with a laser, burning it in the process. It could have been much, much worse if this was my eye, or someone else.
So, be VERY careful when doing this, wear safety glasses avoid firing the laser with the lids open, and remember I take absolutely zero responsibility if you hurt yourself following any of these processes!
Focusing the Laser on a K40 laser cutter
There is no adjustable Z, which is of course stupid. With mine, I found I could engrave something, but I couldn’t cut through anything. This is because the 3mm MDF I was cutting wasn’t at the correct focal point for the laser, which *should* be 2″ away from the lense. I say “should” because, well.. quality control on these things isn’t great (see a theme here?). Which meant I need to find the proper focal point for my laser/lense combo. To do this, you’ll want to perform a ramp test.
A ramp test essentially cuts/engraves a line along an angled piece of scrap material, and where you see the thinnest (ie most focused) part of the line will show you at what height the laser is the most focused. This is the point that you want to be right in the center of what you are cutting. Now that you know where the focus point is measure this point to your laser, and that is the height that should be directly in the center of whatever you are cutting. Notice the problem yet? It’s not the same is where your stock bed is, and your stock bed isn’t adjustable.
This is why you’ll want to rip out the stock bed, and add a lab jack OR get an adjustable laser head OR think about shimming whatever you cut (which will never be accurate). Currently I’ll be using an adjustable lab jack, but I may look at buying or building and adjustable motorized Z Table at some stage – I find that a $17 lab jack does the trick right now though! I might consider drilling a hole in the front of my machine and extending the rod that can be adjusted on the jack to make it easy to adjust on the fly.
What software do I need for my K40 Laser Cutter?
The software that is usually bundled with these lasers is usually trash. It’s pirated and requires some sort of dodgy pirated USB dongle in order to make it work. I’ve learned my lessons after hearing horror stories of slicers that came with 3D printers having all sorts of viruses and trojans bundled with them, and there is no way in hell I’m installing any of these onto my computer. So, do your self a favor and throw out the bundled software/USB dongle as soon as you get them, and download the following instead:
K40 Whisperer: “K40 Whisperer is an alternative to the the Laser Draw (LaserDRW) program that comes with the cheap Chinese laser cutters available on E-Bay and Amazon.” It’s an excellent free program that works with a PC (I use it on a cheap netbook) and with a lot of messing around you can get it to work on a Mac (I haven’t had any success with this yet). You can get it here.
Inkscape: According to Wikipedia “Inkscape is a free and open-source vector graphics editor. This software can be used to create or edit vector graphics such as illustrations, diagrams, line arts, charts, logos and complex paintings.” It’s a great free alternative to something like Adobe Illustrator or Corel Draw. It’s designed for PC, but with a bit of messing around you can get it working on a Mac as well (which I had to do). You can download it here. Generally you’ll want to go into document properties and set the document up to have a custom size of around 8×10 which matches the MDF sheets that you can get off ebay. You should only use Red, Blue and Black on any of your images. Black will be raster engraved, blue will be vector engraved and red will be cut if you are using K40 whisperer.
It’s worth nothing however that if you go down this route, you’ll need to make some edits to files you use as often they use different colors to denote cutting, vector and raster engraves, so double check everything first, and make necessary adjustments to avoid disappointment.
Where can you find files for your K40 Laser Cutter?
You can find files in a variety of places including Thingiverse (Try searching “MDF Terrain” “Laser Cut Terrain” and other similar searches, I’m also putting together a collection here) and right here on Wargaming3D.com. Generally speaking you are looking for .SVG or .DXF files that you can use. You’ll also need to take into consideration the materials you are using, especially their thickness, generally speaking most common files use 3mm MDF or hardboard, and will have cuts this size for slotting the cut MDF together, if you plan to use thicker (or thinner) materials, you’ll need to take this into account.
One thing you’ll want to do with all of your files is double check the document properties to ensure that they have been set up to fit your print bed size, and the size of the wood or acrylic you are engraving/cutting. Remember that people will be using a variety of different laser cutters, with different bed sizes and capacities, so their files won’t necessarily be set up to just “press print” on your K40. So, you’ll need to rearrange them, possibly split big files into multiple smaller ones that take advantage of.
What materials can I cut and engrave on my K40 Laser Cutter?
You can cut and engrave a wide variety or materials that are useful for wargaming, but the most common will be:
- 3mm MDF Board: This is my preferred material to cut and looks the nicest for miniature wargaming terrain and bases, but is hard to find where I live.
- 3mm Hardboard: If I can’t find MDF, or the project requires a lot/something cheaper and the back side doesn’t matter, I’ll use hardboard instead. For those who don’t use metric, 3mm works out to be around 1/8″
- 3mm Acrylic: This is what I’d use for tokens, counters, templates and other gaming aids. If you have a choice between cast and extruded acrylic, you’ll need to consider what is most suitable for the purpose you are using it for, which you can read more about here.
I’ve found it very hard to source MDF Board that is thin enough (3mm or 1/8″) locally on the east coast of the United States (I’m based just outside of Washington DC), while it is easy to find in California and the west coast, as well as Australia, New Zealand and the UK. Due to this I have to resort to buying it in boxes on Ebay or Amazon, which is far more expensive than buying it in sheet form. For anything where I don’t need to see the base/reverse side I’ll often substitute with 1/8″ HDF that can be purchased very cheaply (around $3.50 for a 2×4 foot sheet that will easily fit in a family car, or around $7 for one that is 8×4 foot) from Home Depot or Lowes.
With regards to Acrylic this can be purchased online from a variety of suppliers, though in the USA E Street Plastics seems to be the most popular supplier when buying in bulk. You might also have some luck by speaking nicely to local sign making companies and asking if they have scrap plastic in their bins that you could experiment on.
Other things that you could potentially cut include:
- Plywood
- Paper/Card Stock (on VERY low power settings)
- Cork
- Delrin
- Cloth
- Leather (not fake leather though, it can be dangerous)
- Magnetic sheet (ideal for magnetic basing of models and movement trays)
You should never attempt to cut the following materials (based on this list) due to fire, fume or other hazards:
- PVC (Poly Vinyl Chloride)/vinyl/pleather/artificial leather
- Thick ( >1mm ) Polycarbonate/Lexan
- ABS
- HDPE/milk bottle plastic
- PolyStyrene Foam
- PolyPropylene Foam
- Epoxy
- Fiberglass
- Coated Carbon Fiber
- Material with Sticky Glue Backing
Making sure your K40 Laser Cutter keeps working
Depending on what laser you get, you will have the option of either Analogue or Digital controls. I purchased an “upgraded” one that comes with a digital power meter. In hindsight I should have gone for the analogue one – the reason being, that the digital output of a percentage is meaningless. Without standardized parts or designs, it’s just “40% of what?”. These lasers aren’t designed to be run on full power, and running them too strong can severely reduce the lifespan of the laser tube. Due to this you are going to want to install an ammeter. The most common ones are found on eBay or AliExpress and tend to run under $10. The general rule of thumb on these is to keep the power under around 15mA for the K40, and ensure your water temperature stays in the 18-20c range.
https://www.youtube.com/watch?v=5uEaNLUhofw
Setting up an Air Assist
One of the most important modifications you can make to your laser cutter is setting up an air assist. This blows the smoke and other debris away from the cutting beam and ensures that you are always cutting at full power, meaning less chance of fires and cleaner, more consistent cuts. It’s not really required when engraving, but for cutting it’s a must have.
Shopping list:
To do this you’ll need an air assist end that can either be purchased or 3D printed. You’ll then need to add a source of air that can be something simple like an aquarium fish air pump, rubber tubing, and a drag chain. Attach the air assist to the laser head, thread the rubber air tubing through the drag chain to avoid it from interfering with and being damaged by the laser, connect to the pump and you are good to go. Please note that if you are using a 3D printed air assist, you must run the air ALL the time otherwise you run the risk of setting it on fire.
Conclusions
Firstly, these are not plug and play machines. If you are one of the lucky few who get something that works right out of the box, that somehow has the focal point set to cut 3mm MDF correctly, that hasn’t been knocked around in shipping and has it’s mirrors aligned etc, then great. For the rest of you, purchase one of these expecting it to be a project that will require some effort, frustration, money and time to get it working correctly.
I’ve tried to include all of my experiences and lessons learned in here to make it as simple as possible – but, because we are dealing with something that is manufactured by a variety of different companies, to differing standards, everyone’s experiences will be slightly different. Think of it like the early 3D printer kitset printers that were clones of the Prusa i3. Some worked fine, while others burned down peoples houses if they weren’t careful.
You will need to (at an absolute minimum):
- Make sure the machine is safe by correctly grounding it.
- Properly vent the system
- Properly cool the system
- Replace the software with something that works like K40 Whisperer
- Ensure that the mirrors are properly aligned
- Ensure that the laser is correctly focused on the material that you are cutting.
- Set up an air assist
- Find some cool files to cut
I believe though that these are worth the time and effort, that with a bit of tinkering, that you can end up with something that for under $1000 used to require around $10,000 to achieve, and finally puts laser cutting of MDF and Acrylic in the hands of the wargamer. That said, don’t hold me responsible if yours doesn’t work, you shoot your eyes out, you electrocute yourself, or you burn your house down.
This article will be a constant work in progress as I use my K40 more and more, so if I’ve missed something out, got something wrong, or you have a suggested update, let me know in the comments. For further reading, I’d like to suggest the following book that’s available on Amazon (it’s aimed at model railways, and is a few years out of date on the 3D printing side of things) but has great content on laser cutters, and if you have an account on scribd, it’s free: