The complete and utter idiots guide to 3D printing in resin for Wargamers

As an Amazon Associate Wargaming3D.com will earn from qualifying purchases.
I’m terrible at printing, I can’t level a bed to save myself, I need a raft whenever I print in FDM, yet I still manage to get decent prints. This is through trial and error, and spending way too much time on Facebook groups, reddit and every blog I can read. I’ve recently taken the plunge into 3D printing with DLP resin using an Anycubic Photon. This post will cover what I’ve learned through failed and successful prints, while trying to achieve the holy grail of prints that work every time (60% of the time). The post will assume that you have the same or a similar printer, and some software will be specific to the Photon (which is currently the most popular entry level resin printer) though generally the concepts will apply to other similar printers.
Why Resin?
Most people will start with FDM printing, and I’d definitely recommend starting that way. It’s cheaper, safer, cleaner and in my view easier for the uninitiated, there is also a lot of information out there to get people started. Often people will ask whether they should get a FDM printer or resin printer, in my view you should aim for both, starting with a cheaper FDM printer. There are plenty of things I wouldn’t print in resin due to size and cost of printing, such as 28mm tanks and terrain pieces, while there are other things that I wouldn’t dream of printing on FDM where resin is far better suited such as figures (I realize that people do print miniatures on FDM, but for the average person it’s really not worth the effort compared to the outcome) and gaming pieces at smaller scale (such as those suitable for games like Epic 40,000, Flames of War, Team Yankee, Cruel Seas or Micro Armor).
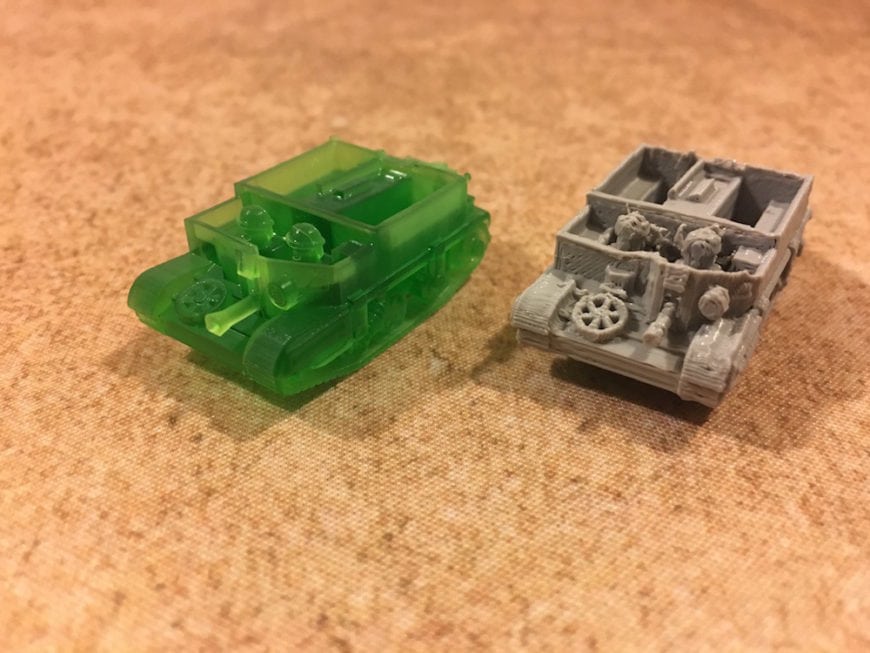
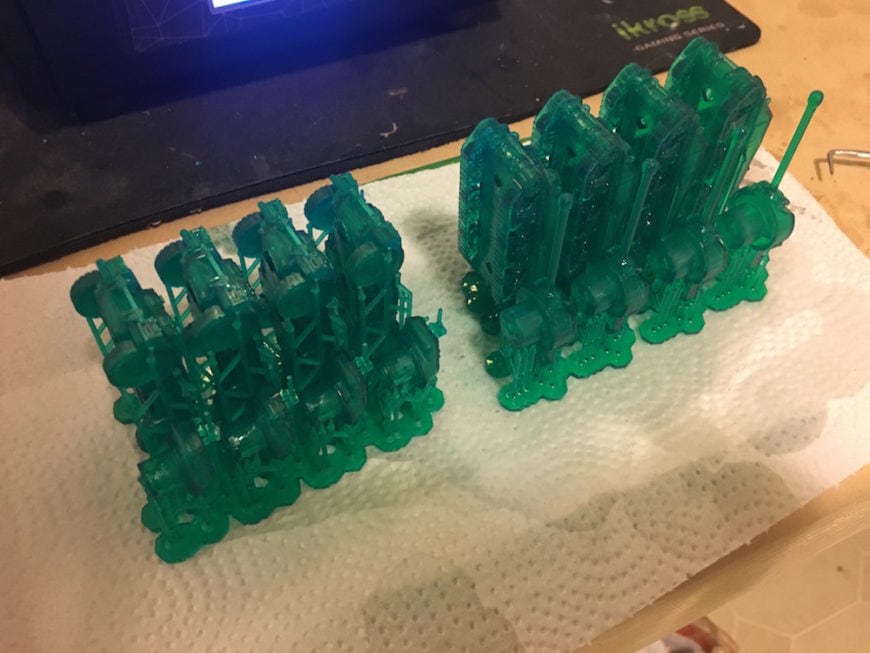
Resin printers can produce far more accurate, higher resolution prints, with easy to remove supports making them ideal for small, high detailed printed items. Based on my experience they are definitely worth the investment if you are a 3D printing, wargaming hobbiest, but they do have a very steep learning curve. The final result is definitely worth the effort:
Making sure you have everything your need
First, resin printing is way different to FDM. With FDM all you need is a printer, filament, a scraper, files, slicer and maybe some hairspray for bed adhesion, plus any tools for cleaning up your prints. Resin printing is a far different (and messier) beast.
Here’s what you’ll need to print in resin:
- Your printer (I have an anycubic photon – I’d chose one of the older ones over the new photon S)
- Your resin (I use anycubic resin, in trans green)
- Files (you can find them here, patreon or on thingiverse
- Slicer (I use chitubox)
- Disposable nitrile gloves (Not Latex, I’ve found these are not sufficient – I use these ones, or the blue ones from Harbor Freight if I’m out that way)
- Disposable paper towels. (Whatever you planned on buying, get more, I use the white ones for putting my prints on to drain/dry)
- Blue Shop Towels (I use these for cleaning my vat, and wiping up any spills as its far more absorbent than ordinary paper towels)
- Isopropyl Alcohol (95% or better) aka IPA (not the beer, though you’ll need some of that too). Whatever you planned on buying, get more.
- Paper funnels with filters. (Whatever you planned on buying, get more – I use these).
- A plastic funnel (for when you screw a print up and need to use the above paper strainers to pour resin back into the bottle – any cheap funnel will do)
- A plastic scraper (I have a set of these that I use for removing failed prints from the FEP sheet)
- Metal paint scraper/putty knife set) (I use these for removing prints from the print bed, don’t worry about scratching it)
- Jars or containers (I find a pickle jar is best, as they have a built in strainer – for doing my first stage of IPA rinsing before I put it into the ultrasonic cleaner)
- Safety glasses (I learned the hard way when I nearly got uncured resin in my eye while trimming off supports post print – safety glasses will protect your sight)
- A trash can (preferably one with a lid, as you don’t want kids or pets getting anywhere near uncured resin in the trash – ideally you should cure before disposing of it)
- Metal Ultrasonic Cleaner (These make life so much easier, especially with cleaning hollow prints to ensure you don’t have uncured resin seepage)
- Patience
- A source of UV light (The sun, or for those of us where there’s winter, a UV lamp and appropriate box) for curing
Choosing your printer
I decided to purchase a printer over Black Friday week in 2018, and in the end I came down to a shortlist of 3 3D printers:
- Anycubic Photon: USB operation for files, uses proprietary .photon files, slicer (which is rebranded version of Chitu, with very little options) works with mac or windows, compatible with chitubox (far superior to what comes with printer) software. Better quality build plate than D7.
- Wanhou Duplicator D7: USB operation for files.
- Creality3D LD-001: Has wireless and ethernet functionality and automatic bed leveling. Reviews suggest problems with the slicer
2019 Update:
A lot has changed since I first posted this, the following similar printers are also now on the market:
- Anycubic Photon S: Very similar to the original Photon. USB operation for files, uses proprietary .photons files, slicer (which is rebranded version of Chitu, with very little options) works with mac or windows, compatible with chitubox (far superior to what comes with printer) software. Upgraded dual Z Axis guide prevents Z wobble.
- Elegoo Mars: USB operation for files, uses Chitubox (which works with Mac or Windows)
- Epax X1:Uses Chitubox (works on Mac or Windows), supports Anti Aliasing, Double Steel Rod reinforced Z Axis gantry.
- Longer SLA: Uses proprietary “Longer” software which seems to work fine on Windows, but may have issues with Mac
- Monoprice MP Mini: Auto level build plate, needs firmware update out of the box, Web UI + Creation Workshop & Print Studio software support, magnetic build plate, can print over the web or use a Micro SD card.
- Phrozen Sonic Mini: Uses CHITUBOX slicing software, has a mono-LCD screen. Phrozen recently released a Sonic Mini 4K, which has been getting excellent reviews with regard to print detail (obviously a high priority for miniature printing!).
- Sparkmaker: Uses SD card and spark studio for slicing, has potential to be one of the better budget printers out there, but if given the choice would still go with a photon due to the massive amount of support online.
In the end I went for the Anycubic Photon, the reason, it had the most active Facebook group, slicer that worked on a mac, and didn’t have any major problems that I didn’t feel that I couldn’t overcome. It also helped that there was a $70 discount applied at checkout when I purchased it. What you get is up to you, but for now the Anycubic Photon is probably the best option – I still think this to be the case in August 2019.
Slicing your files
For those of you used to FDM printing, you will have used a slicer such as Cura to create your Gcode files from STLS. The process is similar with resin printers. The Anycubic photon cones package with this own port of Chitu, which I’m not a fan of. If you are wanting something a bit more powerful, check out Chitubox which can be found here, while it’s support group can be found here on Facebook.
The Angle of the Dangle and a little bit of Suction
Printing with resin is far different to printing with Filament. Firstly, the build plate is at the “top” of the print, which is lowered into a vat of uncured resin, which is cured layer by layer with a UV projector as the build plate raises up on it’s Z axis. As it does this, the resin has a suction effect that pulls at the print and can result in a failed print if it detaches from the bed, and cures to the FEP at the bottom of the vat. This can be avoided by using more aggressive supports as well as angling the print. Personally I’ve had success (and failure) with both vertical and angled (people recommend .45 degree angles) prints. If you are running into failed prints, this is something you’ll need to consider, though personally I think having strong supports makes more difference, at least when printing tanks and the like.
Another reason to consider angling your prints is due to the placement of supports (which I’ll get into further into the article). Supports are placed wherever there is an “island” (effectively an unsupported part of the model perceived from the orientation of the build plate. These need to be removed and can require sanding or filling if there is any chipping, so ideally will be on the back or undersides of the model. You can ensure this but angling the model in such a way that the back is facing the build plate making for easier support cleanup.
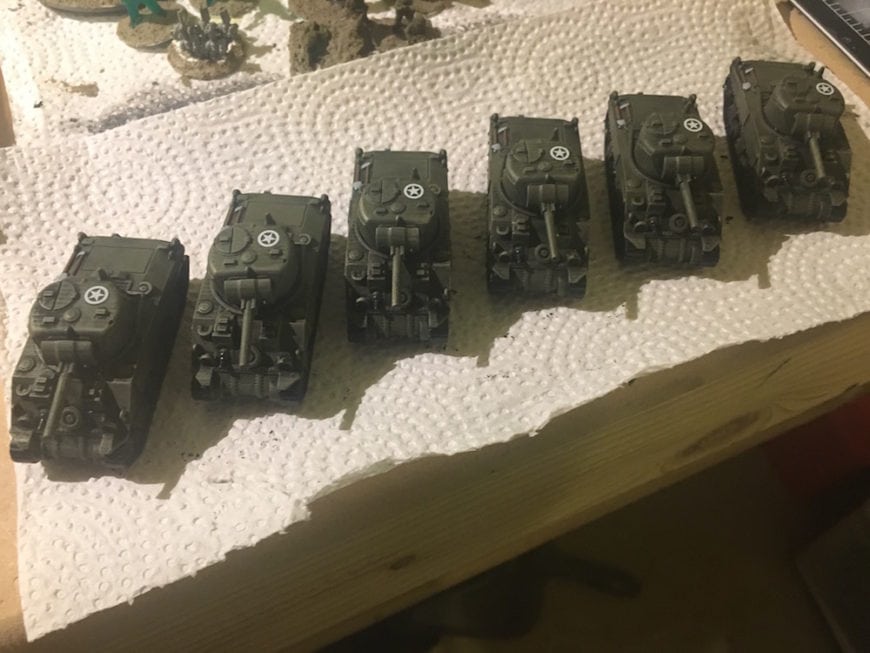
For 15mm vehicles where there are lots of flat bits and sanding won’t damage details I’ve found I’ve had the most success printing vertically, which also allows me to average about 4 turreted vehicles for WWII per print, while for figures, I’ll always angle to minimize the amount of supports needed on the front facing parts of the miniature.
Hollowing Prints
Resin for 3D printing is expensive, and while I personally prefer the weight and feel solid prints, I still hollow most of my AFVs as it saves a significant amount of resin, making them even cheaper to produce, it also means you are less likely to need to fill up the vat multiple times during a print, something I learned the hard way.
There are multiple ways of doing this, and the stock slicer that comes with the photon does not support the hollowing of prints. If you want to use the stock slicer, the best bet is to use a piece of third party software such as Meshmixer, which can handle the heavy lifting as outlined on this Makers Muse video:
Personally I prefer an all in one solution, which means I’m using the powerful Chitubox Software. It’s still a work in progress, so don’t expect it to work all the time (something you should be used to now with 3D printing) but now that I’ve got the hang of it, I seem to have no problems. You simply select the models you wish to hollow and click the “hollow” option to hollow out the model. This will hollow out the model according to the settings you select.
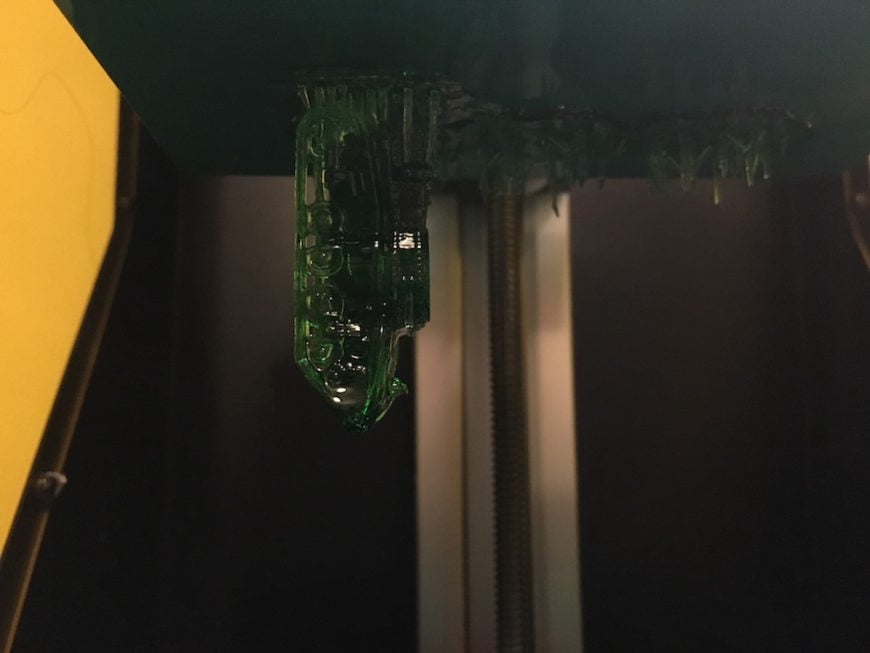
You then want to ensure that you include some vent/drainage holes on the underside of your print to allow a) air to flow which will help resin drain during printing and b) to allow uncured resin, IPA and/or water to drain out in the pre curing process. Ideally you should make these holes as big as you can get away with without damaging the model, I usually start at around 8mm for a 15mm scale tank with multiple holes in the base of the hull, and 4mm for the base of the turret (sometimes I can fit two holes in there). Ultimately the more the better when it comes to having a clean model for curing. I don’t use plugs to fill the gaps in, as I hide mine in the underside of the model, so you can safely delete these plugs most of the time.
Supports
Generally you’ll be printing highly detailed models on your resin 3D printer and the vast majority of these models will require some sort of support to ensure that they print is successful. Supports are required to allow the parts of the print that do not have a direct connection to the build plate to print. The good news with supports with Resin V FDM printing is that they are far easier to remove than what you would be used to with traditional FDM printing if done correctly.
When I first started using my printer I found I was constantly getting failed prints, where the model would break off the supports and cure to the FEP plate, ruining the print and requiring cleanup of the plate, filtering of the resin and starting over. After a fair amount of troubleshooting I found that this was due to my support settings, which as default in Chitubox aren’t sufficient.
Since then I’ve beefed up my supports to the large model settings shown in the video before, to what I consider is probably an overkill, but it’s given me a 100% success rate so far. For those interested in my support settings for Chitubox on an Anycubic Photon, they’ve been copied 100% from this video:
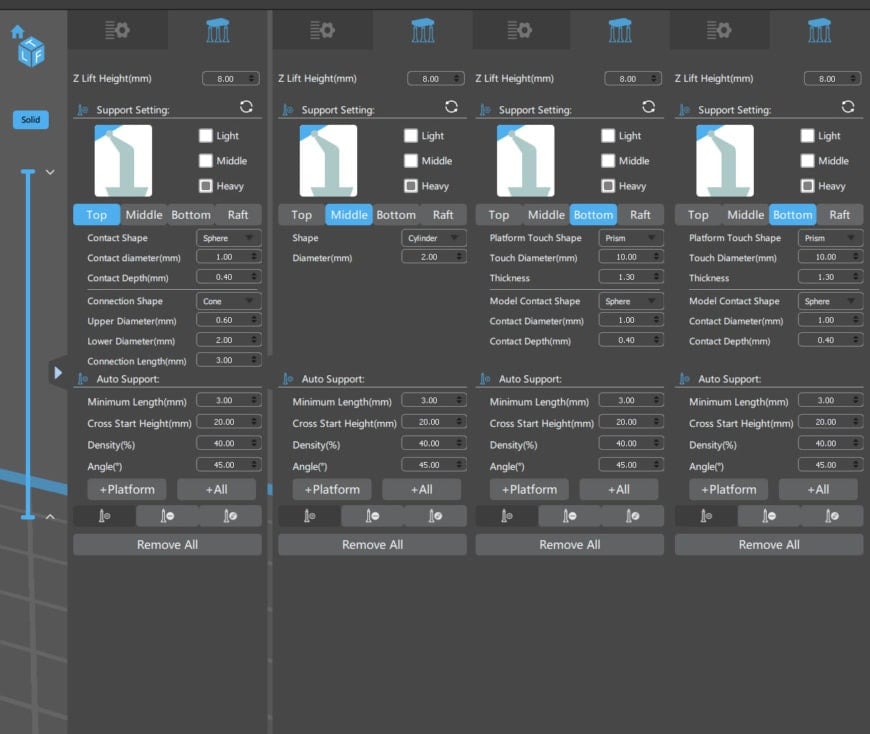
These break off easily without damaging the model, but they do require cleanup afterwards as they leave small “ball” shapes on the model which require filing. I feel this is far superior however to supports that potentially chip the model itself. Soon I’ll test out the small model settings, which I think will also work well, and result in less cleanup.
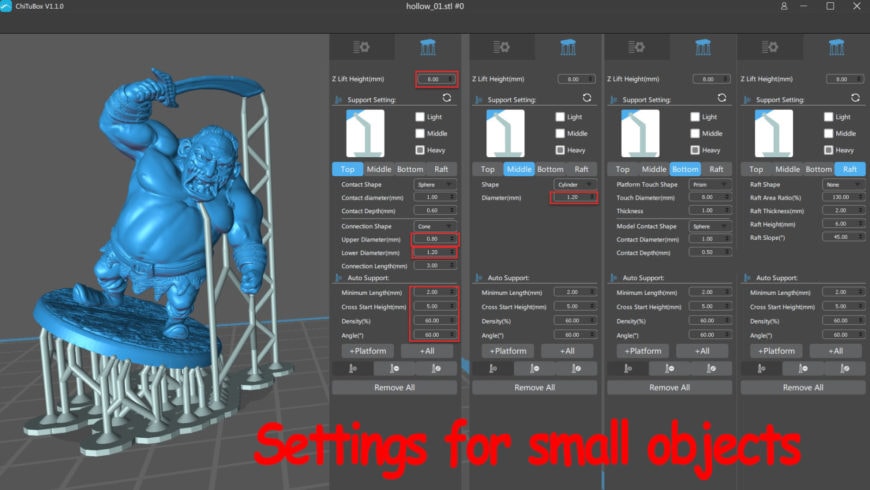
By using these settings, you’ll get a good success rate simply by clicking “+All” and having the supports auto generate. 9 times out of 10 they will put them where needed to print successfully, though more experienced users will often do this, then add or remove supports manually to ensure success, for instance, in the “settings for small objects” image above, there is are still multiple islands that are missing supports, such as around the loincloth, and the guard of the sword, which will need additional supports.
You can learn more about supports and resin printing here. A useful tool, the photon file validator can test for overhangs available here.
Getting your settings correct
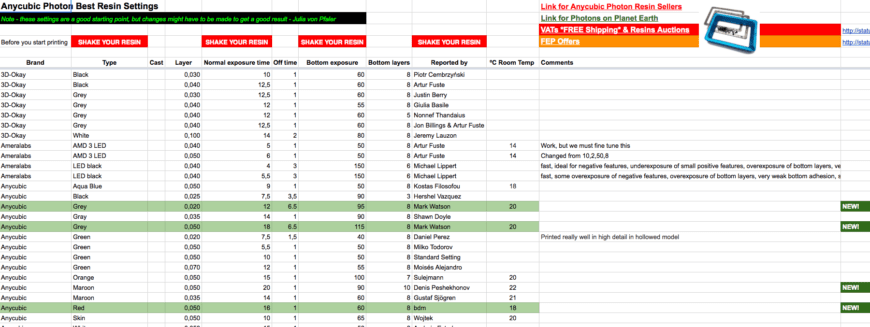
Each brand and color of resin is going to be slightly different, and require different amounts of time to successfully cure. It’s worth checking Facebook for a user group for your printer to find out the optimum time for curing each resin. Eventually slicers will have this information pre loaded, but that’s a long way off. For the Anycubic Photon, use this link for the latest, updated guide to resin settings:
Also search out any repositories for useful software, FAQs etc, such as that for the Anycubic Photon at the Photonsters GitHub here.
Bed Leveling
As with FDM printing, bed leveling is essential to a successful print. Unlike FDM printing, this is usually set and forget and if you’ve done it right, you should not need to adjust it unless you are doing significant maintenance on the printer. I’m fairly confident that I have never leveled the bed on my Monoprice Maker Select V2 correctly, which is why I’m still printing on rafts, 7 months after getting it (thought I think it will be easier now I’ve moved to 3 point levelling, but thats for another post), with the photon, its simply a case of getting the plate to a point that it’s flat with the glass, about a paper width gap (enough for the FEP plate), and then tightening up a screw, as per the below video:
Cleaning Up & Curing
Where resin printing differs from FDM printing the most is in the cleaning up process. With FDM it’s simply a case of popping the print off the built plate with a scraper, removing any supports with pliers, a knife and a dental pick, sanding a bit and then spraying with filler primer before painting, with resin, it’s slightly more complicated, but worth the effort. To clean up a resin print you will need to:
First you’ll need to take the build plate out of the printer. Put on gloves and safety glasses first. Usually I will have a plastic plate with paper towels on it, I will place the build plate on this and use a plastic scraper to remove the print.
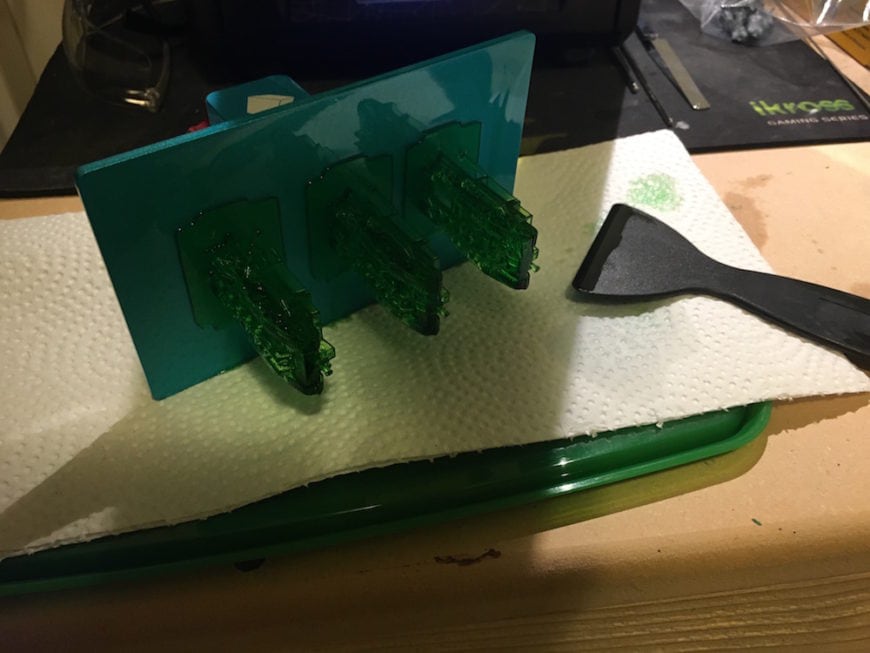
Once removed use tweezers or something similar to transfer the print into a jar or container fill of 95%+ Isopropyl Alcohol and leave for about 5 minutes, then give it a good shake to clean off any uncured resin.
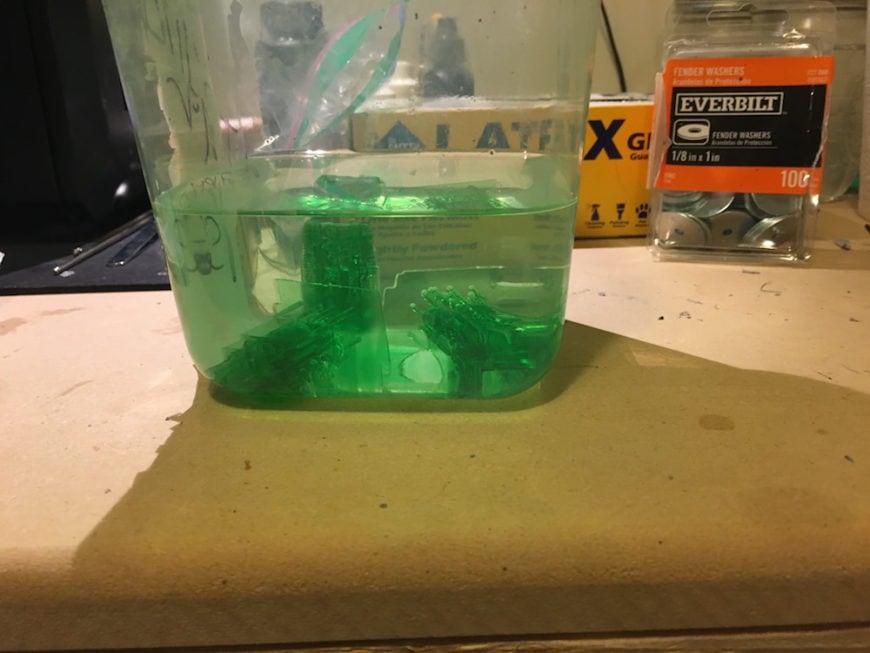
You’ll need to then remove the print from the container, making sure you allow the uncured resin and IPA to drain via the drain holes if the object was hollowed. I then sit it down on some paper towels to dry off.
The next step is optional, but you may chose to transfer it to a second tank of IPA. This means you have a Step 1 IPA tank (this gets dirty fast) and a Step 2 tank (much cleaner). Repeat the process of soaking and shaking, before a third, optional step, of transferring it to Water and giving it a rinse. I’ve stopped doing this recently as Ive found that it can leave a white residue on it, and instead I leave it to dry on a paper towel.
Now you will need to wipe down your build plate and plastic scraper. I use the blue shop towels to do this, as it does a far better job of cleaning than any paper towels. If required, rinse the scraper in IPA. I then store my scrapers in a sealed tub, to prevent any chemicals from getting anywhere on my desk.
Once dry, you’ll want to take your clipper and remove all the supports. It’s far easier to do this while the resin isn’t fully cured. Dispose of this uncured resin in the same trash alongside your disposable gloves, paper towels, etc. if possible, attempt to cure any resin before disposable.
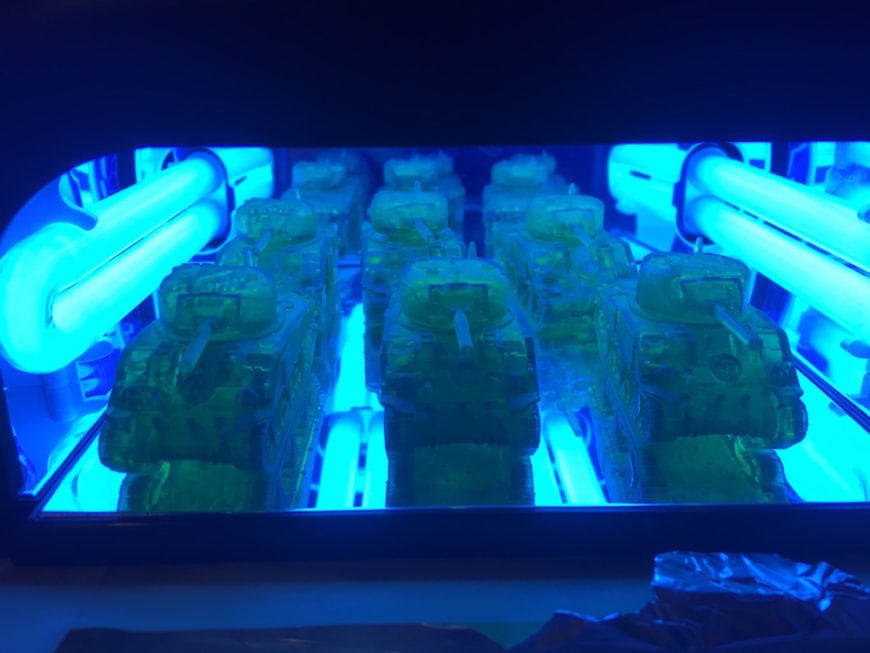
To cure, you’ll either leave your print out in sunlight, or for those of us with winter, under a UV light source.
Print Failures
Its inevitable that you will screw up prints, especially at the start. Usually this will be due to incorrect support settings, or curing settings for a new brand of resin. If this happens you’ll need to scrape the cured resin off the FEP plate, drain the vat and filter into an old bottle of resin. The cured parts along with the filter will then need to be disposed of following correct safety procedures. Wipe down everything, ensure that all settings are correct, and then pour the filtered resin back into the vat ready to start again.
Safety
When you print with FDM printers, the biggest risk to your safety is fire, which can be mitigated reasonably easily with smoke alarms, fire extinguishers and the all important Mosfet mod. With resin printing, its a whole different rodeo, as now you are dealing with a bunch of potentially toxic chemicals and fumes. It is extremely important that you follow proper safety procedures for the handling of uncured Resin, IPA and other chemicals as per the video below.
If you have pets (or children), it’s a good idea to ensure that you have a sealed trash can to prevent them from getting in contact with it or ingesting anything. Make sure you always use nitrile or other chemical resistant gloves, and use safety glasses – resin and IPA aren’t nice on your skin, or eyes.
Don’t tempt fate by setting up your printer in a room with carpet. If possible have it on a wipe clean surface such as plastic or stainless steel. If if gets on fibers it won’t come off, and they will need to be disposed of. I learned this the hard way when I got it on a neoprene paintball tech mat.
How to make a DIY UV Curing Box
If like me, you experience winter, putting your models outside in the sun to cure simply won’t be possible. Luckily there are plenty of cheap sources of UV light available online. Make sure that it meets the requirements for your resin. There is one sold by Creality 3D with a solar turntable that works well, but you can also use nail polish lamps are great, others use UV strips and buckets, or a combination type approach as per below.
So there you have it, my idiots guide based on what I’ve learned so far. This is a continual learning process, so expect this to be added to and expanded on as I make horrible mistakes, and learn how to fix them in the process. Got any tips or pointers for printing wargaming products in resin? Leave them in the comments below