Heading down the Wargaming Roadway… printing 28mm scale wargaming roads
Heading down the Wargaming Roadway…
Terrain on a gaming table can’t affect your dice rolls and it won’t prevent you from forgetting that your opponent’s shrek team was on “ambush’ as you advance your T-34, but it can greatly improve your gaming experience.
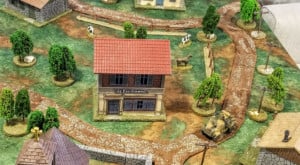
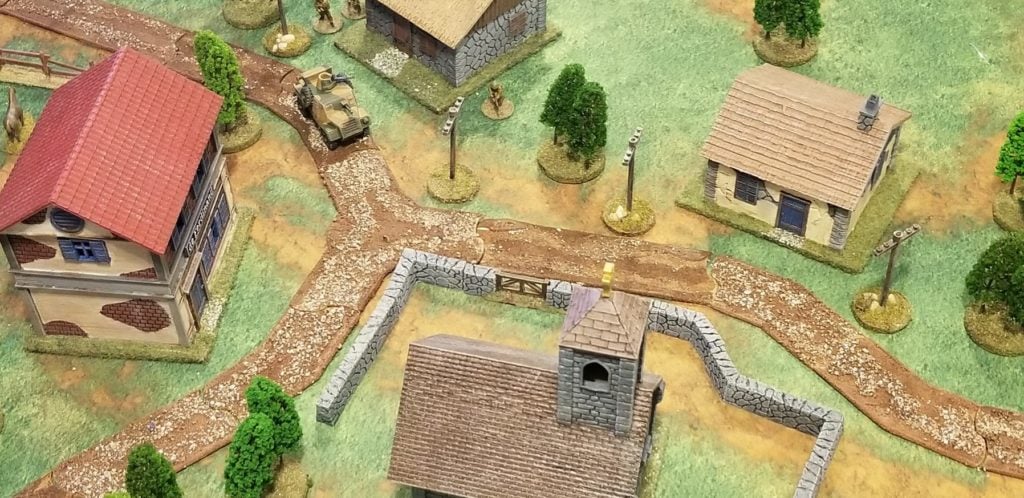
Terrain is most often thought of in terms of buildings, trees, and fortifications. An often-overlooked aspect is the roadways on the table. We have all seen various efforts and styles, both homemade and some commercial, in use. I had previously made ones from thin foam sheeting, cork tile, and even some brick like patterned vinyl they sell in craft stores around Christmas. There are issues with these, most often being warping and the fact that the roads end up being straight, with right angle intersections.
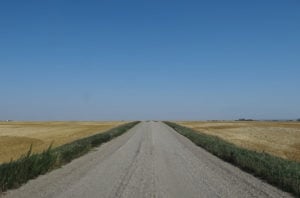
I find that unless you are in a metropolitan area or are on the western prairies, few roads are actually straight. They all wind to account for elevation, rock outcrops, tree stands, or existing buildings. Secondly the use of straight, unobstructed roads on the game table can create a tactical imbalance. If a player has a clear LOS down 48” of straight road he can muzzle his opponent, then and there. Does that happen in real life? Perhaps occasionally, but even today in rural Europe you seldom see do you see flat, straight roads in the rural areas. Seventy-five years ago with motor vehicles being much less common and public works projects less civic minded, it would be rare indeed.
I created my first 3d printed road system some time ago. It was admittedly more complex than it needed to be. I had put too much detail in the actual surface, and the joining system was a male-female system, meaning you could end up with two male ends or two female ends abutting.
Stop it right there. I am talking about .stls and gaming. Seriously, please stay focused.
I developed a much simpler system which only has four different .stls; a long straight piece, a short straight piece, a 45 degree curve a three-way intersection. Each piece is devoid of detail save for a raised ridge on the edge and a center crown on the road. The road is quite narrow – 50mm wide, which in 28mm scale represents a roadway 2.8 meters or a little over 13’ wide. These are 1940s rural dirt roads. They didn’t build them as two-lane roads, because the traffic they had didn’t justify that. If you want them wider, simply upscale the files in your slicer to perhaps 120%, but I (somewhat subjectively) think the current size works well.
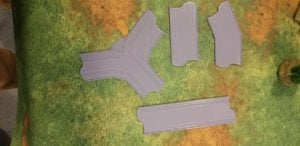
The simplicity helps with the printing (although it is still time consuming) but that requires some post print work by you to get them table worthy.
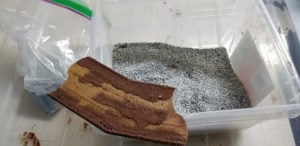
- The print itself is clean and simple.
- Prime with a good quality primer. This is essential. Don’t skimp. The primer, either a rattle can or quality primer, is necessary to allow the adhesion of the next step.
- When the primer is good and dry (I wait for 24 hours) mix up some good (not dollar store) PVA with a few drops of brownish craft acrylic paint. Do the edges and some of the road center in random patterns. Then sprinkle sand box sand over this. Lay it flat. You will see in about five minutes the sand will sink into the PVA and the surface will appear wet again. Sprinkle another generous serving over the top. Don’t disturb the PVA; you are just letting the sand fall onto the PVA.
- Leave that overnight to dry.
- Now you mix up PVA again with a few drops of craft paint. Paint the bare surface between the sand covered sections. Sprinkle these with (clean) cat litter, to represent gravel and stone. Add a little sprinkle of sand over top the cat litter.
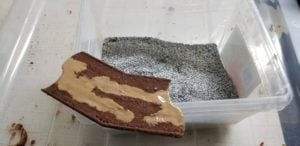
- Lay this flat to dry.
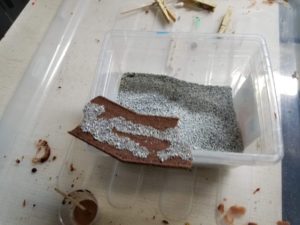
- (this is an optional step, but you can then bush the entire surface with a coat of Pledge acrylic floor finish. This helps seal the road and give some flow to the next step – once the pledge is dry!)
- The next day do a light brown tinted wash. first shake each piece gently to shake off, over a waste can, the sand and cat litter that didn’t bond in the PVA. Being somewhat frugal I tend to make my own washes for terrain, rather than use expensive modelling quality ones. So I mix some artist brown acrylic ink with distilled water and mix well. This will give a tinting and depth to the surface.

- When that is laid flat, and is good and dry, I spray the works with a rattle can matt varnish.
I may seem labourious, and it is a bit, but when you are done, you have a flat stable, durable and flexible (is the sense of design, not bendability) road system that stores compactly and will last you a very long time.
The file is available for a free download here at www.www.wargaming3d.com