A Worrywart’s hesitant plunge into the resin pool…
I started 3d printing for my wargaming in January 2018; way back then FDM the home hobbyists’ tool of choice was an FDM, or filament, 3d printer. That soon changed as inexpensive SLA resin printers came to the market – the Anycubic Photon and the Elegoo Mars leading the charge. These printers gained wide acceptance among creators and hobbyists, who used them to create finely detailed prints that FDM printers can not match….
BUT….
The resin printing process is quite different from the FDM process. While others jumped without hesitation into the resin pool, I was reluctant to make the plunge, despite being gobsmacked by the outstanding resin prints posted on various Facebook group sites.
Why the hesitation?
Because I am a card-carrying pessimist. I will never be confused for Bobby McFerrin.
I subscribe to the belief that Murphy’s Law will never be repealed.
Here is a short list of my excuses for delaying my venture into resin printing.
- The Learning Curve : It is probably age dependent, but as I am old enough to remember having to get up and walk to the TV to change channels, I just wasn’t sure how many more learning curves I had in me. It took me a while to get synched into FDM printing and designing, and even when thing go bad with FDM, you don’t end up with filament splashing onto your clothes.
- The odour/smell of the resin: This is a very subjective issue. I have read a lot on this topic online and the consensus regarding SLA resin ranges from “it smells like lemons” to “it’s noxious” … and that was in a review for the same brand of resin. My workshop is in the basement, without any window access for venting. Any odours are going to permeate the upstairs. Although most of my senses have deteriorated with age, my spouse’s nose operates on a “very fine” setting, and I would prefer to minimize her concerns about just what I am up to downstairs.
So why did you finally make the plunge into resin (rhetorically speaking)?
I have expanded my designs into artillery and multi-launcher files. They do turn out well enough in FDM, but they are the type of file that seems particularly well suited to resin. As well, the .stls for 28mm scale miniature figures that are currently loaded at Wargaming3d look outstanding. They offer a great potential to build a personalized army for many of the nations I have armies for; filling the voids that exist in commercial lines.
What did you do to ease your concerns?
The first concern I had was the whole learning curve issue. The amount of information available is itself overwhelming, and that itself is part of the issue; it is like a tsunami of opinions and facts churned up by every Google search. I saw the need to filter the wheat from the chaff.
There is a great introductory article right here on this site;
The resources of www.all3dp.com was a great help. I find there articles quite helpful; be it recommendations for resin, comparisons between printers, or printer trouble shooting.
YouTube also is a great resource, but you can waste a lot of time there with unscripted, unedited videos of some fellow mumbling on his I-phone. Reliable reviews and tips are forthcoming from Makers Muse and 3D Printing Nerd. There are many other good videographers, I am just noting two that are reliably professional, knowledgeable and entertaining.
The second concern was the odour of the resin printing process.
I knew I would have to vent the unit (I ended up choosing an EPAX X1 resin printer).
Here is my set up. I will explain what I did and why.
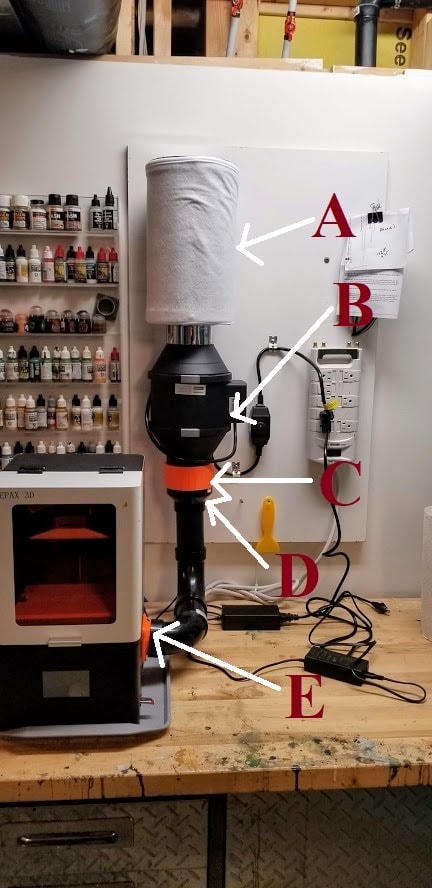
A: SUPERIOR CARBON FILTER: 1050+ RC 48 Australian Virgin Charcoal Bed. Dimensions: 4″ x 14″. It recirculates the air after filtering through this substantial filter.
B: VIVOSUN 4 Inch 190 CFM Inline Fan with Speed Controller. You need the auxiliary fan; the internal fan of any printer just doesn’t have the power to move the air. This beast does it in spades.
C: PTEG printed Collar to join Fan to piping. Depending on your set up you may want to run 4″ dryer ducting. In a pinch duct tape would probably work for the joint, but I went with a PTEG print.
D: 3” to 2” ABS Reducer joint – basic 2” ABS piping serves as the ducting, I left a connection unglued to allow me to remove the printer easily (please see photo below).
E: PTEG printed vent adapter, connects to 2” ABS pipe. I adapted a file I found on Thingiverse.
Here is a look at the back end of the EPAX
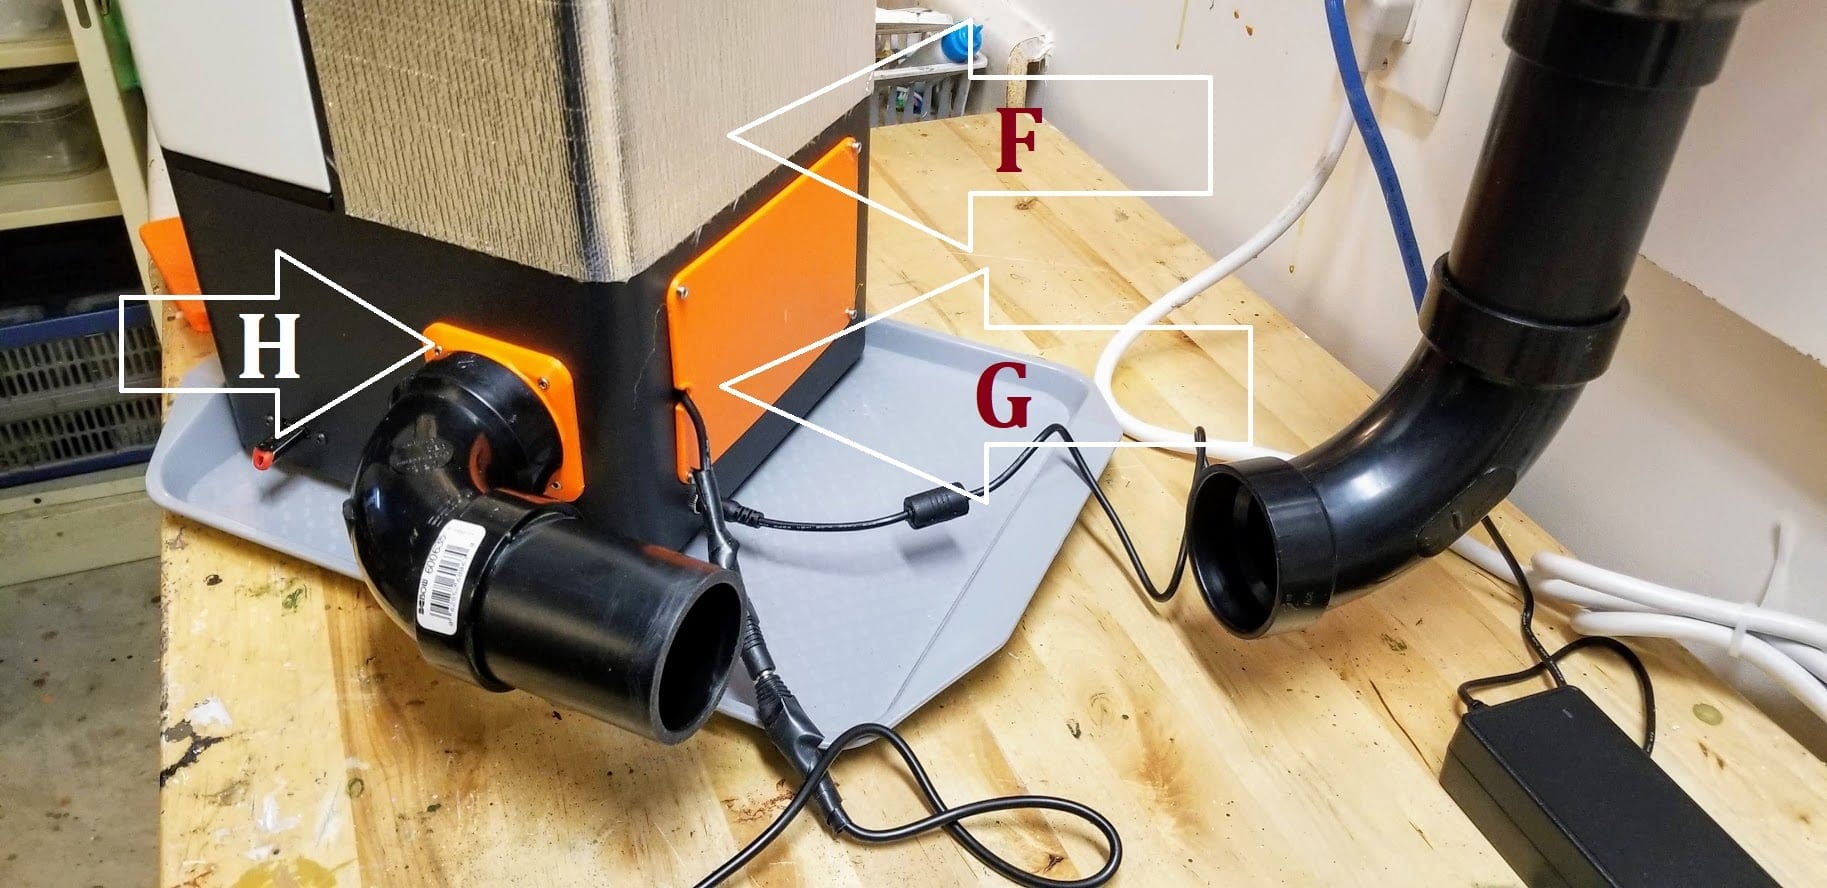
F: 12″ X 24″ Adhesive Backed Heat Barrier – this will help reduce temperature variance; It was trimmed and fastened to the back of the EPAX X1
G: a replacement PTEG panel allowing me to create an opening for the heater power cord (more on that below)
H: the PTEG side vent adapted to accept 90 degree 2″ ABS pipe fitting.
Although these adaptations were made for an EPAX printer, the same process is adaptable for most other brands.
As far as venting goes, you can skip the heater and just run dryer vent outside, but we get a lot of nesting critters in our exterior vents, so I choose this route
You mentioned a heater?
I know many are operate their resin printers in unheated garages and shed without any issue, even at temperatures below 10C.
As I noted before I am Eeyore type and tend to foresee failure if I don’t take a lot of precautions. The EPAX owners Facebook page has a lot of comments and articles on issues with print failure purportedly due to resin being too cool; it very well could be their settings that is the source of the problem, but I wanted to provide myself a wide berth. Perhaps its just an EPAX thing; I really don’t know.
I followed a good guide for adding an egg incubator heater to an EPAX X1 (link is below), and I modified this, and turn it on at least 30 minutes before printing. The heater is temperature controlled (I set it for 80 F – about 25C).
Here is that set up:
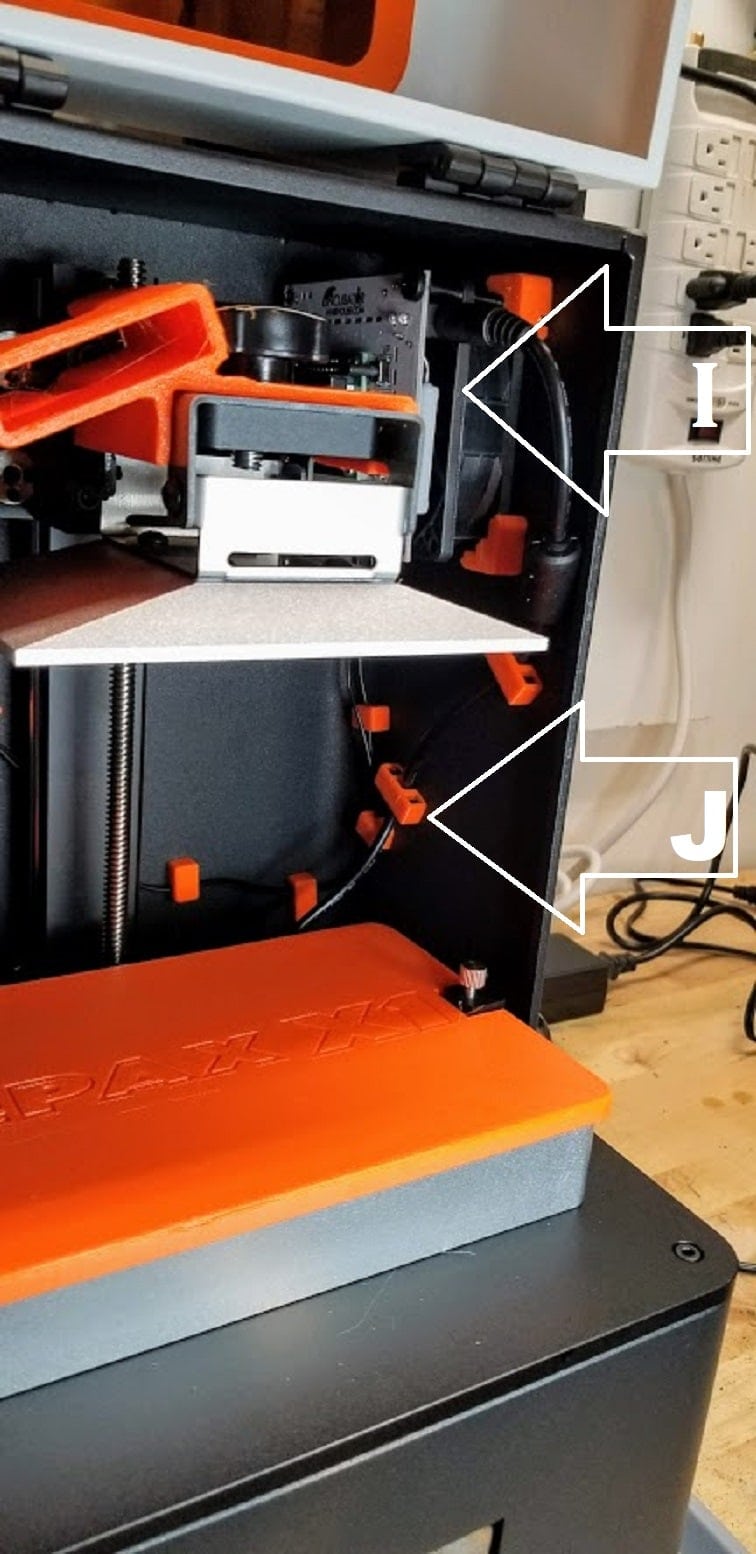

I: An egg incubator : this is the model I picked :IncuKit™ MINI for Desktop Incubators | Thermostat, Fan & Heater SKU: IKMN-NONE-NONE-1099. Please note it is held on with the clips noted in the linked article, and his .stl design for the corner clips.
J: PTEG cable hodlers, which I designed to use 6mm x 3mm rare earth magnets to keep the power and thermostat cables tight to the case, and not impede the printer’s operation.
Here is the link to this article
Again, this all may have been a needless effort; but I know my shop gets cool (averages 15C in winter) and I had to build an enclosure for my Mk3S due to drafts, so I figured the <$100 Cdn. precautionary investment was worth it.
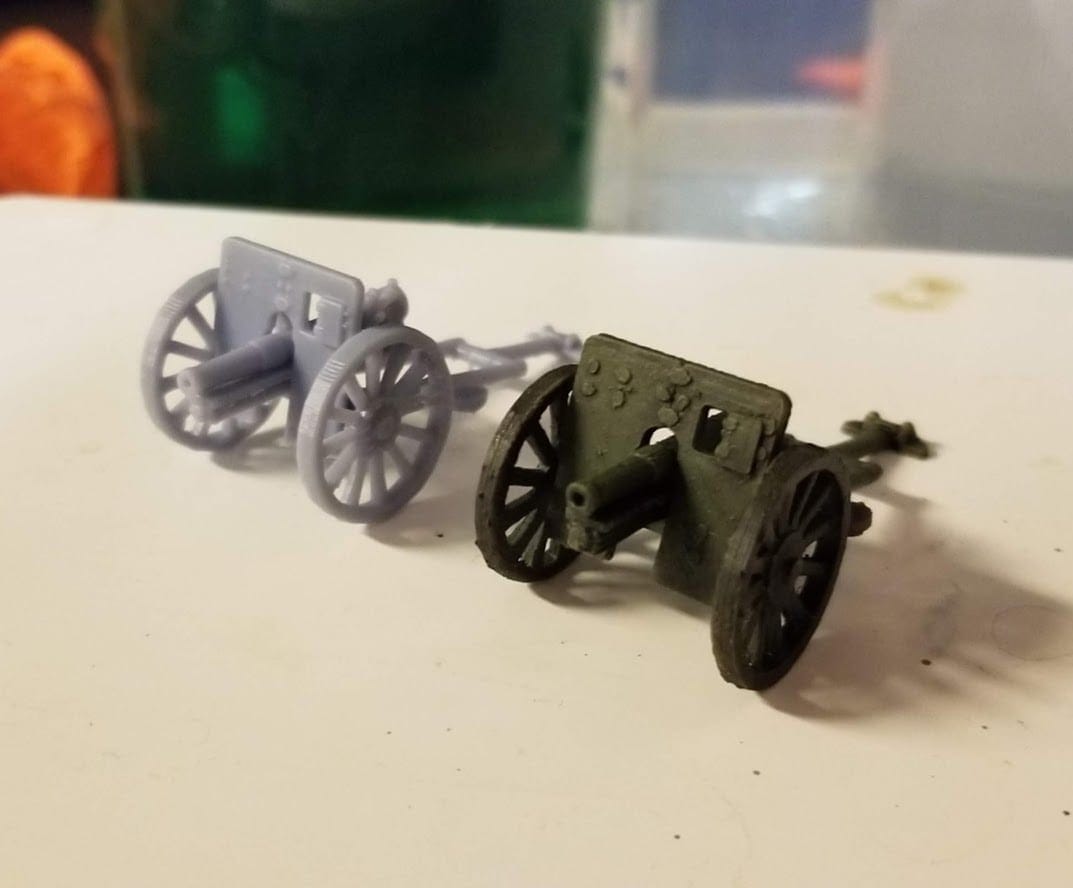
So did it works?
I am very happy to report that my trepidation was entirely misplaced. With the vent fan on I ran through my first files and not only did the prints turn out well, but my wife came home from work and never commented on any odour. That was a relief, and for me it was worth the effort. Again, we are all in different set ups and environments, but with these steps I feel very confident in using a resin printer in a relatively enclosed area.
Happy printing!
Marc / Deweycat