Glues for Joining PLA Printed Parts
Stick with me, kid…
Gluing PLA Filament
Many of us whom print with FDM 3d printers generally do most of our printing with PLA filament. PLA is a versatile, stable and economical print medium. PLA does have some limitations, but for many of us, it is our “go-to” filament.
PLA does have one notable limitation, and that is its chemical composition. Unlike other plastics like ABS filament – which is what LEGO and many plastic model kits are composed of – PLA plastic can not be glued with model cement. This cement, which come in tubes or as liquid, often contain Toluene or a similar chemical. With ABS plastic, it caused the parts to fuse together and forms a secure bond.
The composition of PLA does not react to this glue, and it is not an option. You could, of course, choose to print with ABS, but that opens the door to a whole world of problems. ABS is more expensive, requires venting, and is very sensitive to temperature variation. It would require an enclosure and heated bed, and even with that is often cursed as the prints warp up from the build plate.
So PLA it is. I do encourage others to spend a bit more and purchase a “PLA +” or a “PLA Pro” filament for your vehicle prints and the rest, but no matter what grade of PLA you may chose, this review will apply equally.
“I want to glue my PLA printed parts. What are my options”
Let’s look at some common options as well as a few you may not have considered.
Super Glue / “Krazy Glue” / CA Glue
The Super Glue family are Cyanoacrylate based glues – hence “CA glue” – that are used in just about every household. These glues are favoured due to being relatively inexpensive, widely available and simple to use. They do have some downsides though.
- They have a very short working time. Sometimes you need to readjust a part as you glue it together, and when the glue has set, you have two choices – leave it out of alignment or break the joint and try to clean up and try again.
- CA glue can only bond when there is some moisture is present. Not that the surface has to be damp, but a dry surface will not cause the chemical reaction that activates the glue bond.
- That moisture?… it is all over your fingers or other body parts that come in contact with the clear, thin liquid CA. Anyone that has used CA glue knows exactly what I am talking about.
- The CA glue requires a very tight fit between the parts being joined. It is not a “gap filling” glue, instead it requires a very tight and flat surface on the joined parts. This isn’t always possible with FDM printing.
- CA glue’s bond is based on a chemical reaction. It does not “melt” the parts together so a sudden shock or drop can cause the joint to break.
Two Part Epoxy
Two Part Epoxy is an alternative. These cements come most often in a two-cylinder syringe. You push the plunger and discharge the amount you think you need. The two parts are then mixed together on a small disposable surface (chunk of cardboard, etc.) and applied to the surfaces you want to join. The mixture is thick – akin to a thick paste. The resulting bond is strong, so long as the two parts are in equal amount and the two have been mixed well together.
Two-part epoxies re widely available, and there are “general use” epoxies as well as other epoxies formulated for specific surfaces. For PLA filament, a general epoxy will be fine.
Again, they do have some downsides for hobbyist 3D printers;
- You need to “guesstimate” how much you need to squeeze out of the glue syringe. Once you mix the two parts out, you may find that you used too much and have wasted same or you may find you don’t have enough but now the clock is ticking, because we have the second problem…
- Two-part epoxies have a short work time, usually five minutes or so. Only mix what you can use in that time frame, and have everything ready – cleaned, test fitted, and laid out – before you start. If you find that you didn’t mix enough to cover the area you wish to bond, you are then doing the dance to mix up some more before the current mix hardens. If it does harden, it is done. You can’t reactivate it or even remove it without doing damage.
- Epoxy glue is the polar opposite to CA glue, as it is thick. If you have two parts with a tight joint, the epoxy glue will be sandwiched between the two parts and it may not look or fit quite right. If this filled gap caused by the epoxy alters the dimensions of your model, it may affect further assembly.
ABS Plumbing Cement
Yes, it seems counter-intuitive. We know that model cement works on ABS plastics, and does not work with PLA. Yet the plumbing cement intended for joining ABS plumbing pipe works on PLA filament. It causes a reaction similar to the melding we are familiar with when using model cement and ABS model parts.
It is an option, although I would only recommend it with some cautions, those being…
- It comes in a can with a large “swab” style applicator attached to the can lid. It is not suitable for surgical application. You can use a brush or something else dipped into the can, but you will have to discard that tool after use, as it will be ruined.
- It is, in a word, “sloppy” – it is a thick liquid and will run.
- It doesn’t dry quickly, so you may need to hold or clamp under dry. That is both a positive and a negative, in my view. Sometimes you want to have that window of time for adjusting the parts for a proper fit.
I generally use ABS Cement to affix tank track sections to hull and for gaming terrain pieces, where I need strength and I have a large joining surface.
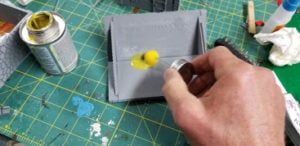
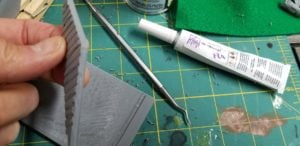
The New Kid on the Block …. 3D Glue Gloop
I just need to say I have not been asked to mention this product or nor have I been compensated in any way, but I did buy some 3D Glue Gloop for PLA for testing. This product (they have one for ABS as well) comes in a tube (just like traditional model cement). It is formulated for the specific purpose as an adhesive for PLA printed products. They have other sizes, and the products have additional properties (bed adhesion, layer minimization, etc. but I have not tried them for that purpose)
I purchased one tube and have used it on several print assemblies. It is a thin clear glue, and care should be taken when use – if it does run it cleans up easily without surface damage. There are no obvious fumes when using, although the makers do caution to have proper ventilation.
Directions of use are
“Just apply a small amount of Glue Gloop! to the bonding surface of both parts, press together for 15 – 30 seconds for a strong tack hold. Let sit for about an hour and your bonded parts will be at 80% strength. After 6 hours, Glue Gloop! reaches full strength!’
My observations are;
- Follow the directions. If the fit is reasonable tight; the parts will tack together quite quickly. I hold or brace for a minute or two then just leave it.
- The set-up time allows ample opportunity for adjustment of the parts, without breaking the bond.
- I did have one assembly (roof and gable ends) and after about 15 minutes later I realized I had reversed two identical parts and had to disassemble the model entirely (e.g. breaking the bond). It was very difficult to separate the parts. The 3D Gloop bond was already very strong. I was able to separate them, without damage, and correct the fit after some clean up. It attested to the strength of the bond, yet the “second chance” it offers you.
The manufacturers also noted many other uses, including to smooth between layers of the print. I have not tried that yet but will do so.
I think this product is a great option and would recommend that you consider it as an alternative PLA adhesive.
The link for their website is here.
Again, I have not been asked to review their product, and they have no idea I am reviewing their product. I just think it is a great addition to my printing toolbox, and wanted to let you know about it as well.